Buttermilk drop biscuits

Everybody loves biscuits. There’s no arguing with this statement. I’m not talking about the flat, sweet, crunchy things that folks on the other side of the Atlantic call biscuits (although those are good too), I’m talking about flaky, buttery, American-style biscuits. If you’ve never had one of these fresh out of the oven, you haven’t lived.

Skip to the short version

THESE are biscuits. End of story.

THESE are biscuits. End of story.

I’ve made a lot of rolled biscuits in the past, the kind where you roll out the dough and cut circles out with a cutter, but lately I’ve taken to drop biscuits. They get their name from the fact that are formed by taking rough scoops of dough and dropping them onto a sheet or pan; no rolling pin necessary. Drop biscuits require less work and therefore less handling, which – for me at least – results in a lighter texture. They are also more versatile than their rolled cousins, and they do rather well with additional ingredients mixed in like cheese or hunks of bacon.


Ingredients

  • 3 cups all purpose flour
  • 2 tablespoons sugar
  • 4 teaspoons baking powder
  • 1 teaspoon baking soda
  • 1 teaspoon salt
  • 3/4 cup (1.5 sticks) unsalted butter
  • 1 cup buttermilk …give or take a bit. More on this later.


Directions

” If Satan has a favorite drink, it’s buttermilk “

Preheat your oven to 425 degrees F. If you happen to be using a cast iron drop biscuit pan, preheat it with the oven. Whisk together the dry ingredients in a large bowl. Now we need to incorporate the butter into the dry ingredients, probably the trickiest bit of the whole process. The most straightforward way to go about it is just to plop the butter as-is directly into the flour mixture and go to work with a pastry blender. If you don’t happen to have one of these (and even if you do), this step can be a pain in the arse. You can try chopping up the butter before dumping it into the flour and using table knives or forks to work it in, but it’s a tedious process. Or………


Optional super-cool way of doing things

Put your 1.5 sticks of butter in the freezer and leave them there for several hours, preferably overnight. Put a cheese grater in there as well.

Yes, you read that correctly. Put a cheese grater in the freezer. I’m serious.

Guess what we're going to do next.

Guess what we’re going to do next.

When the butter is frozen solid, carefully remove it from the wrapper, handling it as little as possible. Using your icy-cold cheese grater, quickly grate the butter into the dry ingredients and mix them together. If you have trouble with the butter clumping together, put your dry ingredients in the freezer for 30 minutes first.

I bet you've never seen grated butter before, have you?

I bet you’ve never seen grated butter before, have you?

Regardless of which method you use to get the butter worked into the dry ingredients, you should end up with a coarse, crumbly-looking mixture with pea-sized lumps of butter. If you want to include additional ingredients (e.g., cheese), now is the time to add them. If this is your first time making drop biscuits, I recommend sticking with the basic recipe to get a better feel for things. Either way, it’s now time to add the buttermilk.

It's not an exact science. Just get your dry mix to look more or less like this.

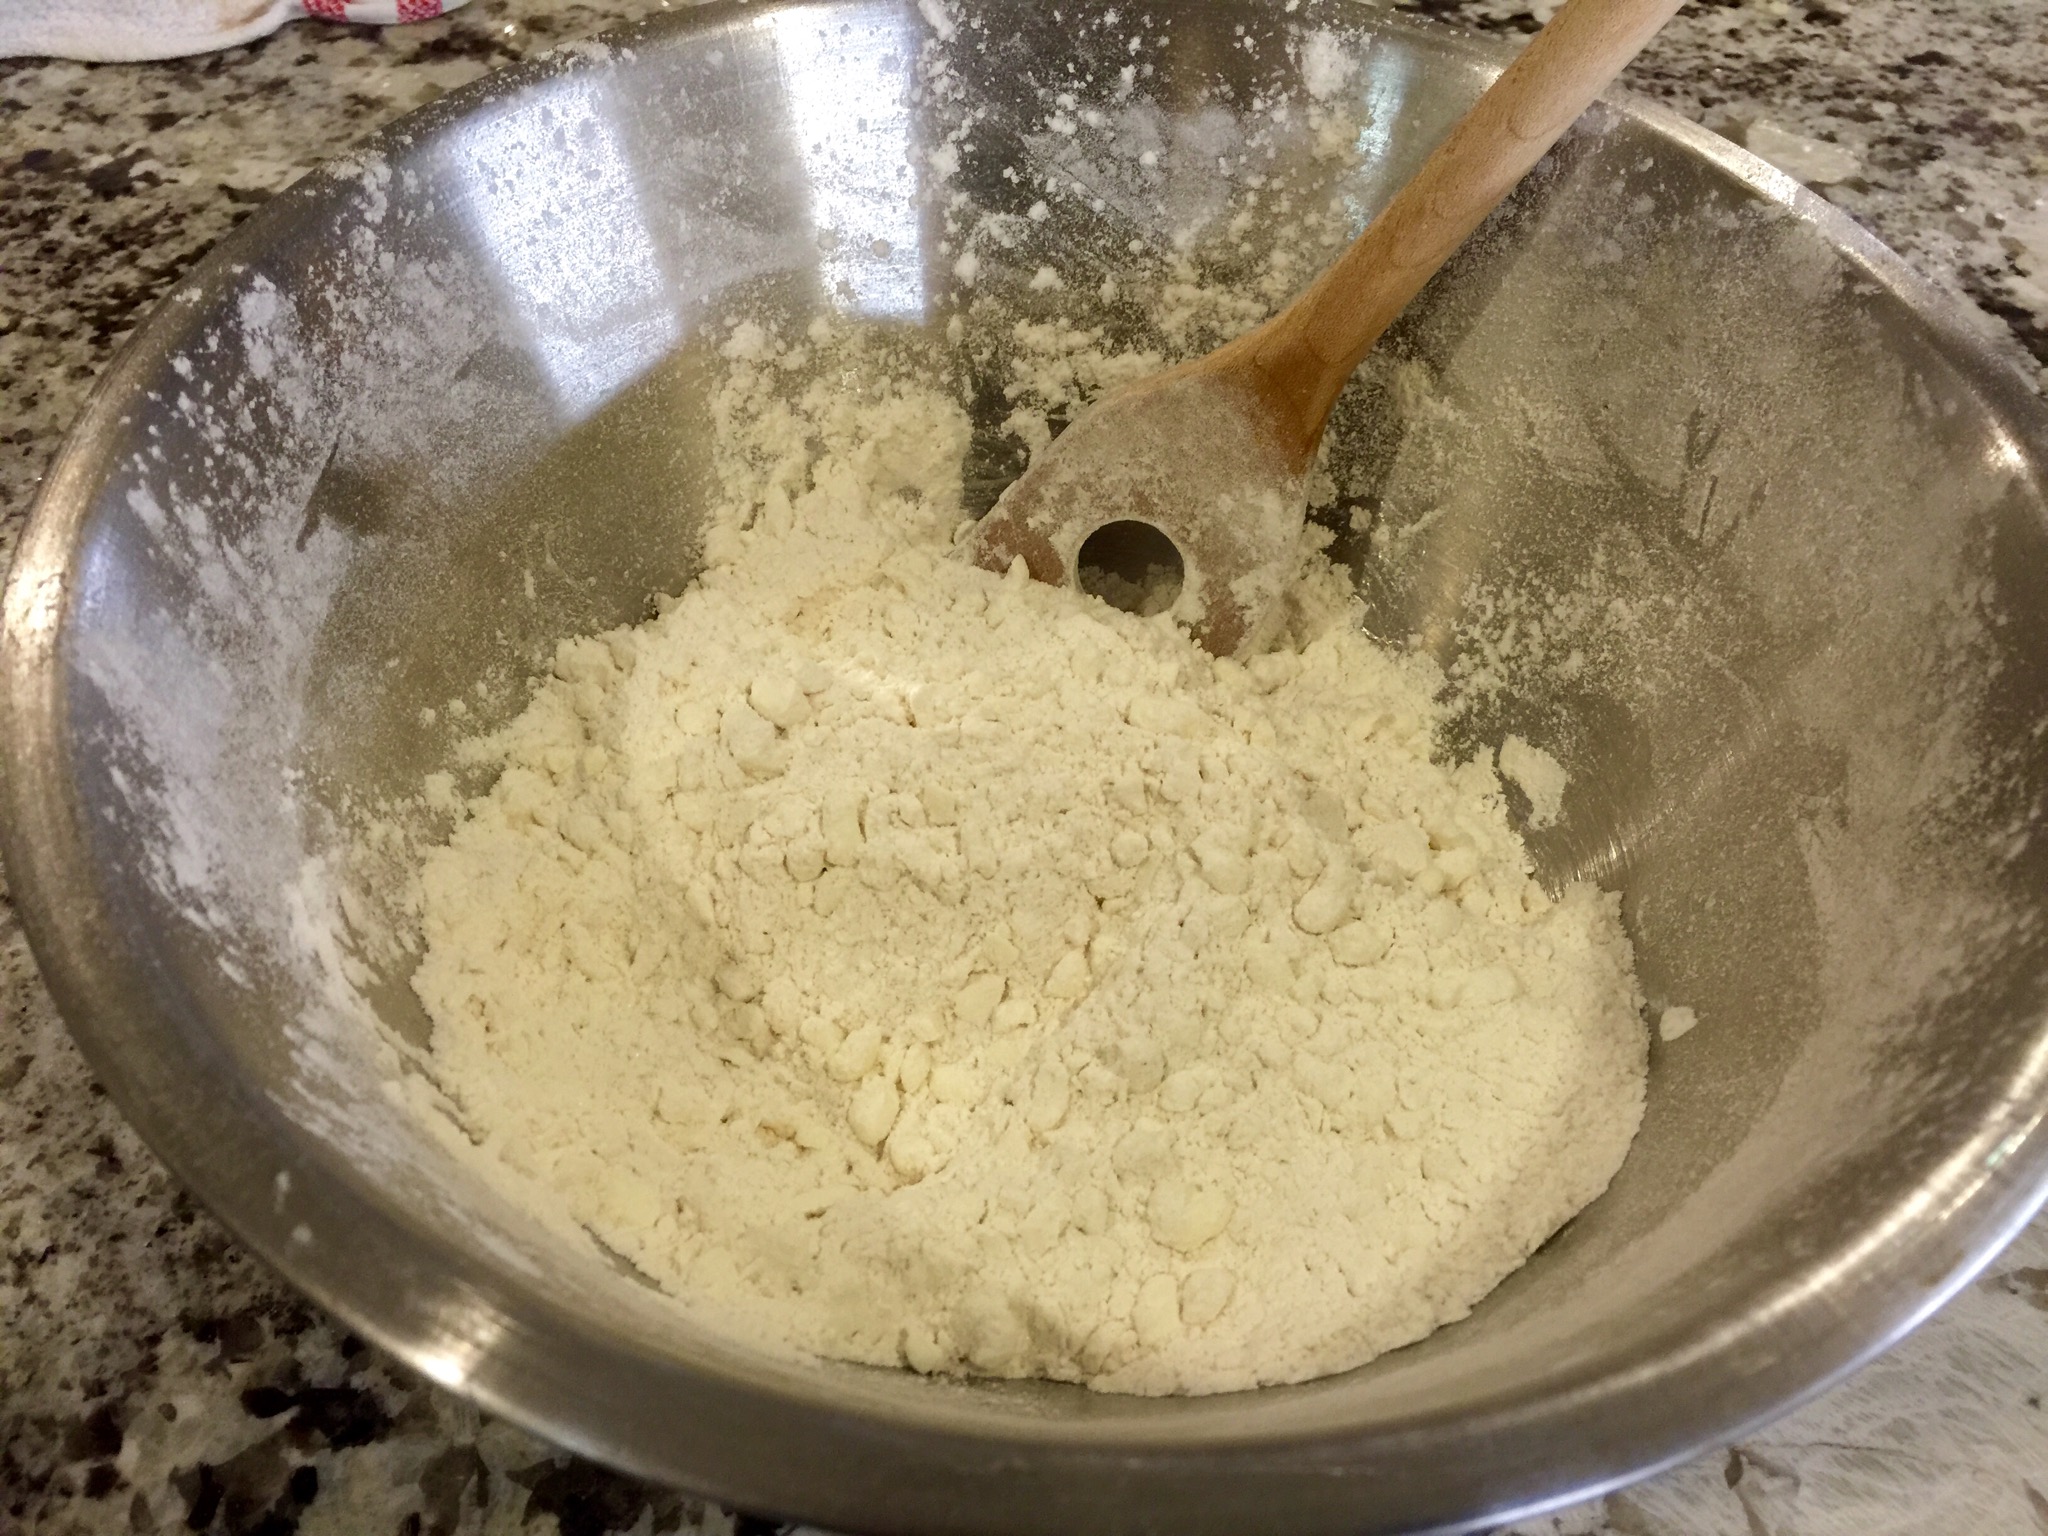
It’s not an exact science. Just get your dry mix to look more or less like this.

Before we go any further, let me just say that buttermilk is NASTY. Don’t ever try it straight up. My friends and family will tell you that I’m grossly exaggerating things, but don’t listen to them. Buttermilk is one of the most horrific things I have ever tasted – my first tentative sip gave me nightmares for a week. It’s like rotten milk mixed with motor oil and rattlesnake venom. If Satan has a favorite drink, it’s buttermilk, I’m sure of it. It’s a mystery to me how such a repulsive ingredient can make such delicious biscuits, so I’m just going to chalk it up to magic and move on with my life.

Earlier, in the ‘ingredients’ section, I mentioned that you should use one cup of buttermilk, give or take a bit. What I mean by this is that the exact amount of liquid you should use cannot be easily determined ahead of time. When it comes to recipes like this one, it’s far more important for the dough to have the right consistency than to use a precise measurement. As my grandmother used to say when teaching me recipes, “Add enough until it’s right.” So, one cup of buttermilk is probably about the right amount, but don’t be alarmed if you need to add a bit more to make the dough firm up correctly.

Use a measuring cup if it makes you feel better, but I don’t even bother with one. Pour some buttermilk into the dry mix and stir it in gently, being careful not to over-work the dough. If you mix the bejesus out of it, your biscuits will turn out chewy and manhandled instead of flaky and light, so use a gentle hand. It will soon be apparent if there is not enough liquid in your dough because it will be powdery in areas and won’t want to hold together. Add another splash of buttermilk – no more than a tablespoon at a time – and turn over the dough a few more times with your mixing spoon. Keep adding liquid as necessary until you get a single, sticky mess of thick dough that stands up all by itself in the center of the bowl.

And this is what biscuit dough should look like.

And this is what biscuit dough should look like.

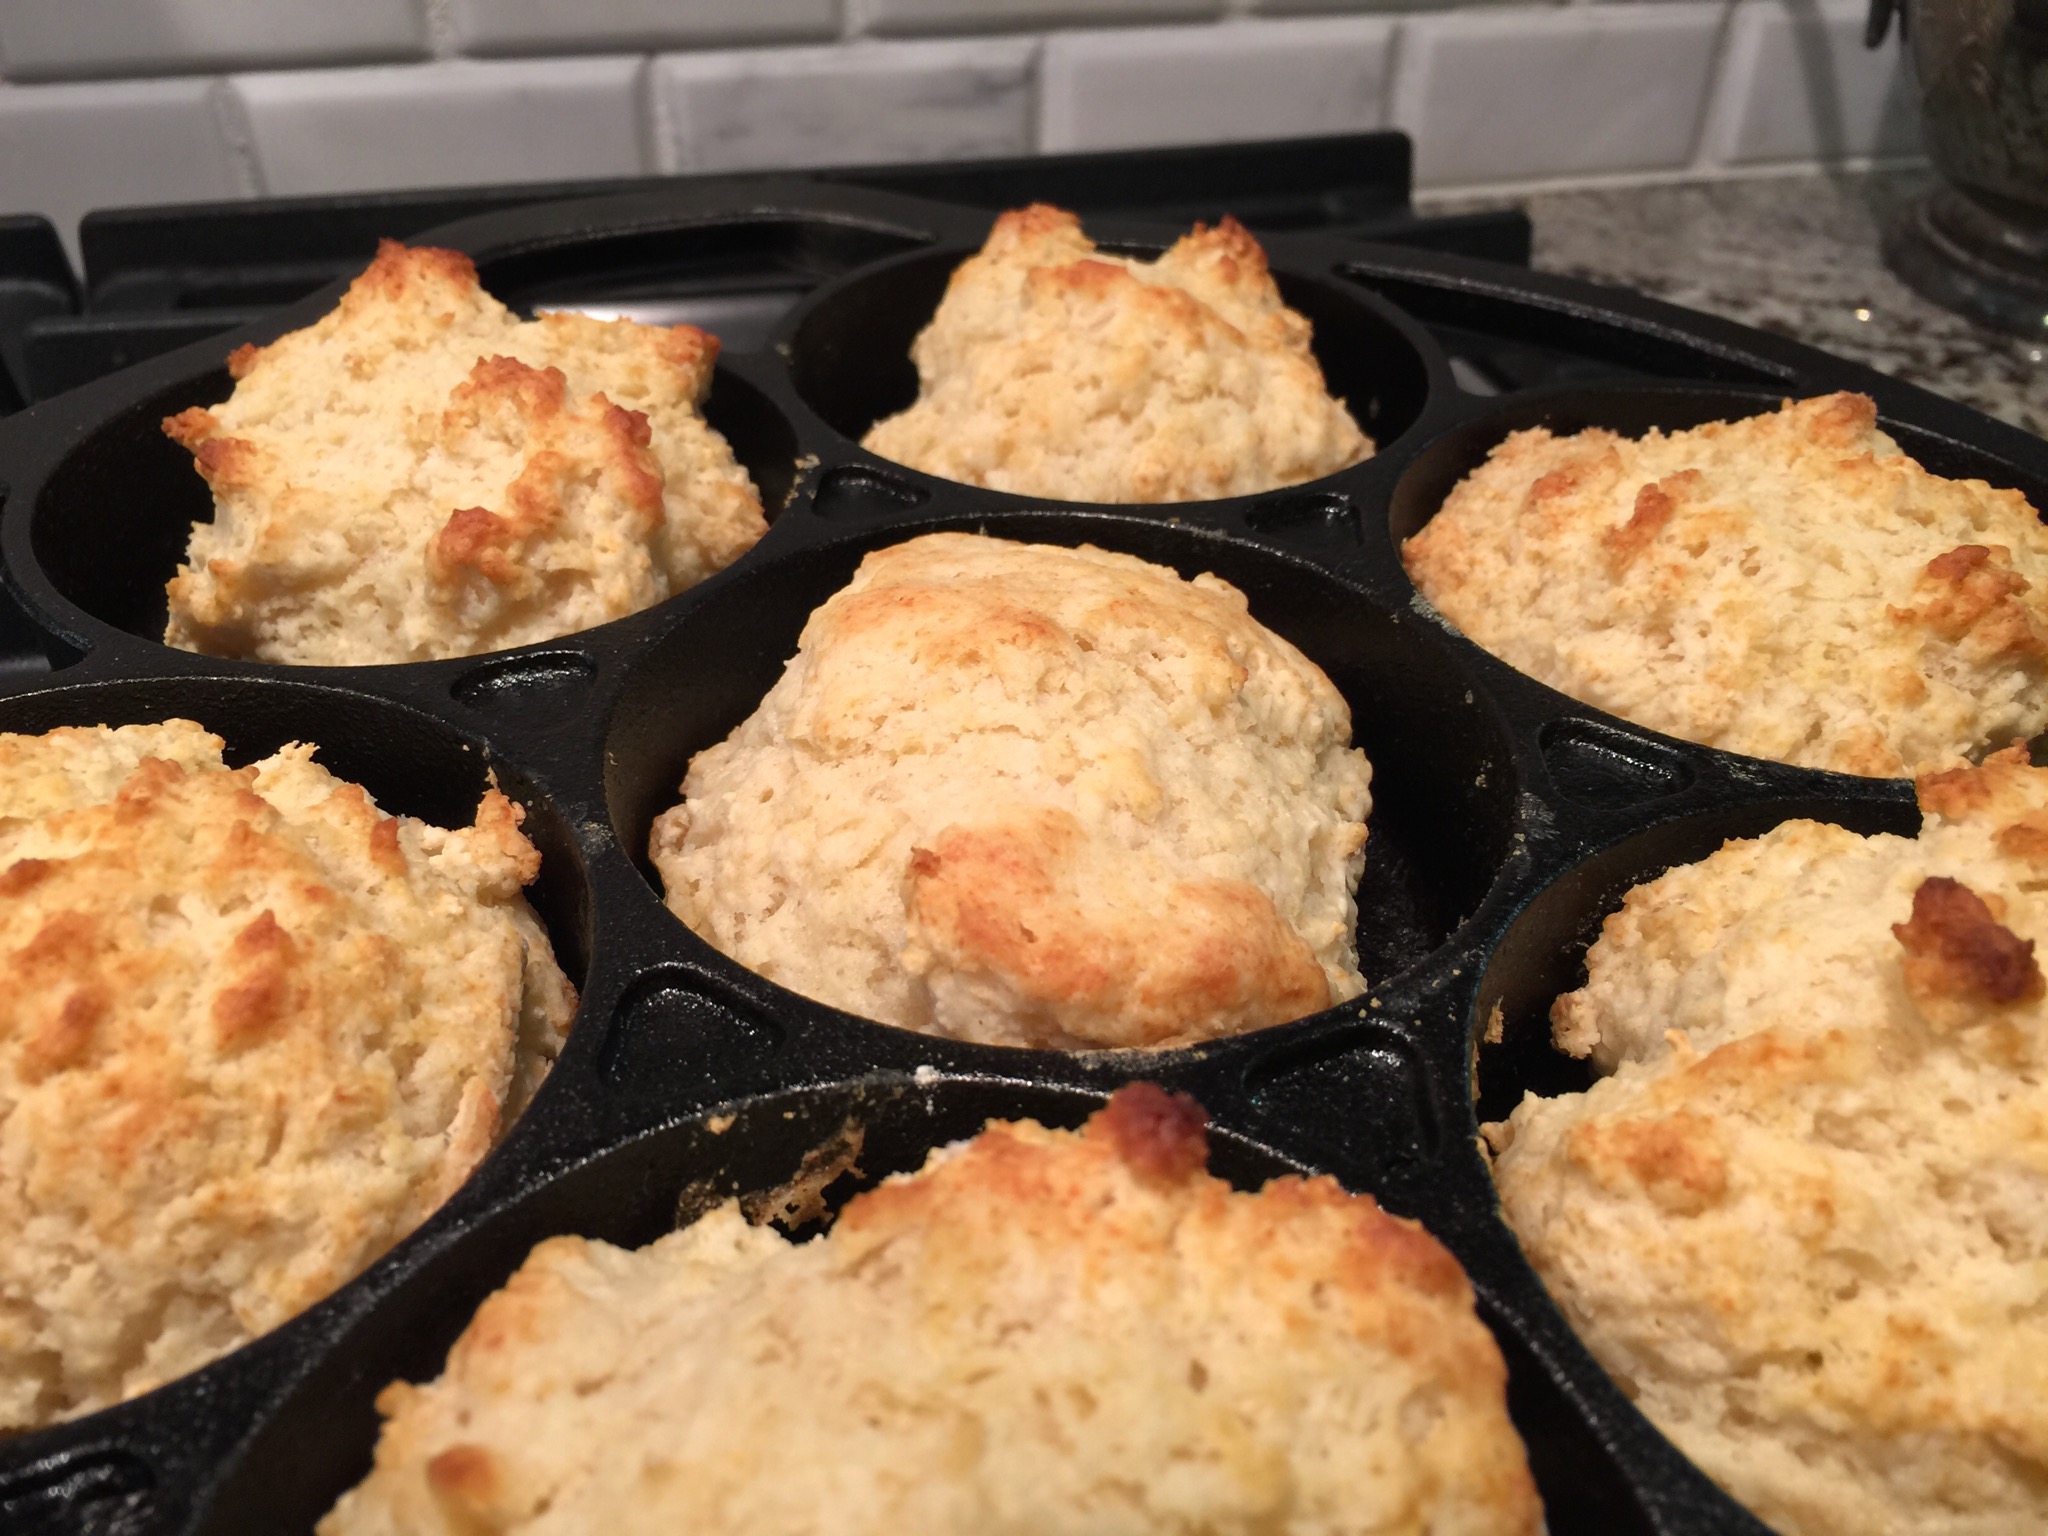
Now comes the fun part. Drop quarter-cup lumps of dough onto a baking sheet (or your preheated drop biscuit pan) and bake for 15 minutes.

They don't have to be pretty. In fact, it's better if they aren't.

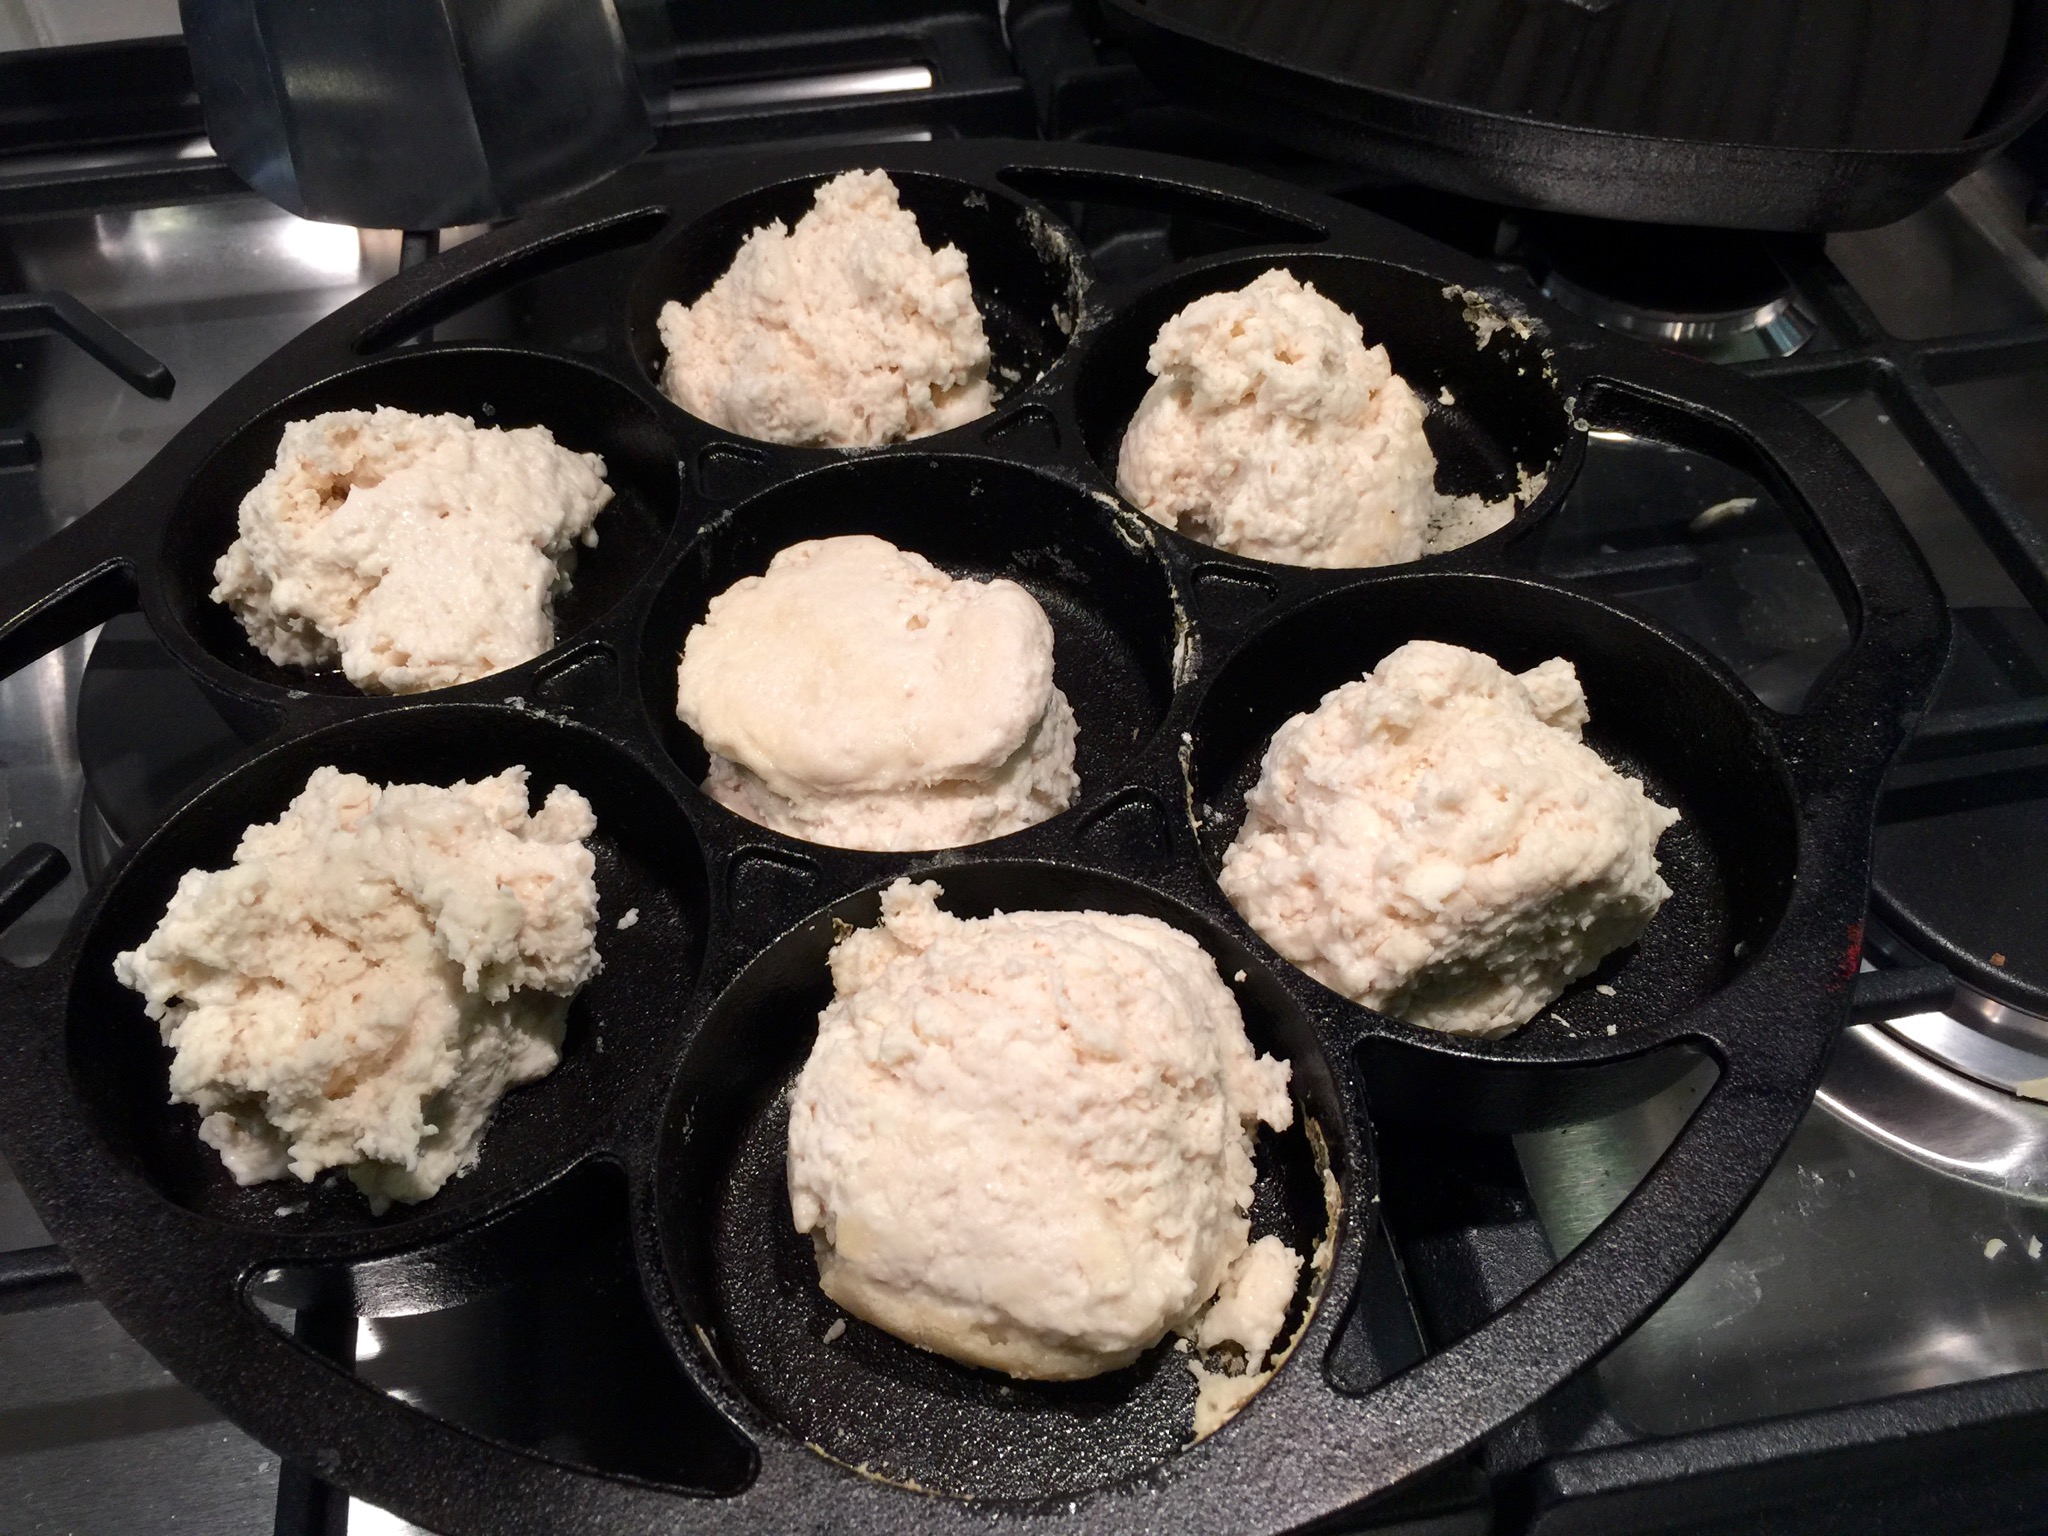
They don’t have to be pretty. In fact, it’s better if they aren’t.

When the tops of the biscuits are golden brown and toasty, they are ready to consume. Serve them hot and with plenty of butter, sausage gravy, honey, jam, or whatever your heart desires.

It's all worth it for this one buttery moment.

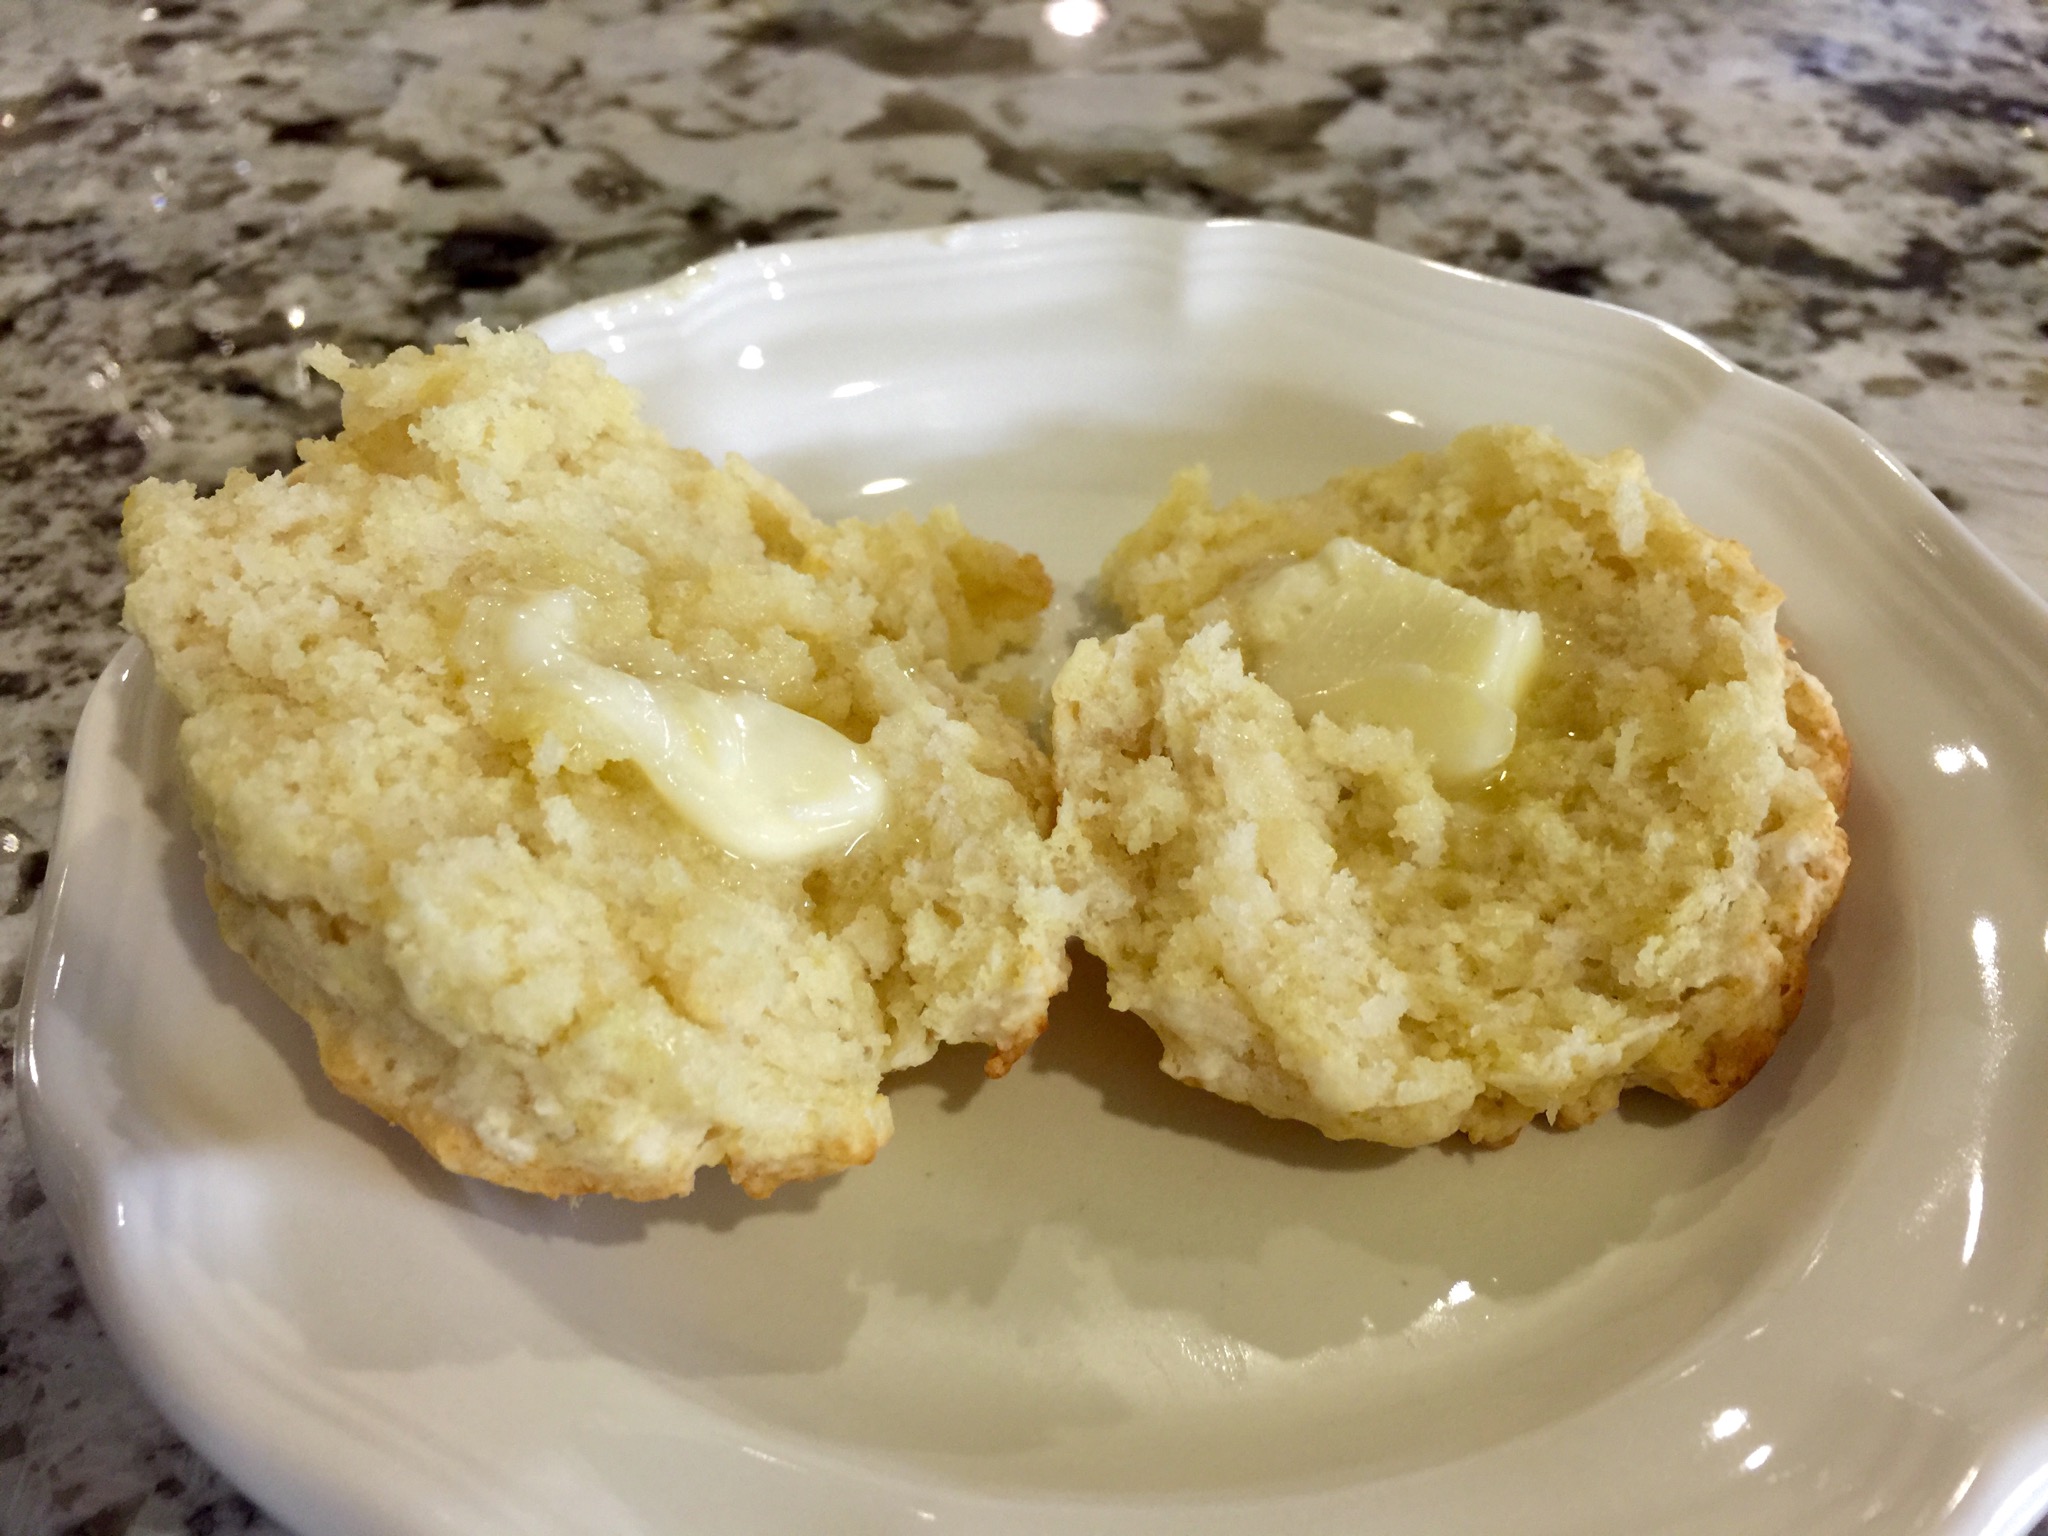
It’s all worth it for this one buttery moment.


tl;dr

Buttermilk drop biscuits

Ingredients

  • 3 cups all purpose flour
  • 2 tablespoons sugar
  • 4 teaspoons baking powder
  • 1 teaspoon baking soda
  • 1 teaspoon salt
  • 3/4 cup (1.5 sticks) unsalted butter
  • 1-1.5 cups buttermilk


Directions

Preheat oven to 425 degrees F. Whisk together the dry ingredients in a large bowl. Incorporate butter into dry ingredients with a pastry blender or by grating butter while frozen. Add buttermilk until all dry ingredients have been incorporated. Drop quarter-cup lumps of dough onto a baking sheet or preheated drop biscuit pan and bake for 15 minutes.


See also


A bacon and cheese variant I made recently. They did not suck.

A bacon and cheese variant I made recently. They did not suck.


Standard Recipe Disclaimer
I don’t come up with a lot of my own recipes (unless you count my own personal milk-to-Grape-Nuts ratio), and chances are the recipe posted above belongs to or was inspired by a person other than me. So if you’re wondering whether or not I ripped somebody off, I probably did. Don’t get out the pitchforks and torches just yet though! I want to make absolutely sure I give credit where it’s due, so if you think someone deserves recognition for something that I haven’t already called out FOR CRYING OUT LOUD LET ME KNOW. Thanks, I appreciate it. Here’s a cookie.


Gott’s Roadside

meter-greatGott’s Roadside is an excellent place. For my own tastes, it’s damn near the perfect eatery. Gott’s serves burgers, shakes, salads, breakfast, and quite a number of other American-style classics. They upscale things a bit by also offering a selection of wines, and their beer list ain’t bad either. There isn’t any one thing I can put my finger on that this restaurant does better than its peers, but maybe the thing that sets Gott’s apart is its consistency. All I know is that the next time I’m in the mood for a burger, I’m coming straight back here.

” My continued fry pilfering did not go unnoticed “

After an exhausting weekend of really and truly intending to do a better job of eating healthy, my wife and I decided one little burger couldn’t hurt… right? And maybe a shake. With fries of course. Mmmm, fries. We almost tried to talk ourselves out of it, but it wasn’t long before our rumbling stomachs made us get in the car and drive to the new Gott’s Roadside that just opened near Stanford. The road to hell, it turns out, is paved with comfort food.

Great location, right on the corner of El Camino and Embarcadero.

Great location, right on the corner of El Camino and Embarcadero.

Because I think I am smarter than my GPS unit, I decided to take El Camino from the South Bay all the way up to Palo Alto. Twelve years and several months later, we arrived at our destination. The right side of my face was getting a little sunburned from being subjected to the Spousal Glare of Death coming from the passenger seat, so I exited the car quickly and made sure to be as politely expedient as possible. We went inside, placed our orders at the cash register, and sat at a booth to await our grub.

Where is everybody?

Where is everybody?

The first thing that struck me about the restaurant is how empty it was during lunchtime on a Sunday afternoon. It may well be that Town & Country Village – the shopping center where Gott’s is located – is more of a weekday kind of spot, and I certainly hope that’s all it is. On the weekends, every parking lot in Palo Alto is jam-packed with Audis and Teslas, and every business is filled to bursting, largely with snooty people in expensive yoga pants… but apparently not today. Then again, Gott’s did just open, and things might just be taking a little while to ramp up.

If you don't like po' boys, you aren't human. Sorry.

If you don’t like po’ boys, you aren’t human. Sorry.

Suddenly our pager buzzed, interrupting my scornful musings of the upper middle class, and I hurried off to grab our food. Shawn’s crispy chicken po’ boy looked delicious, and so did her side order of fries. I had decided not to order any fries for myself because I didn’t really want any, but I figured stealing a couple of hers would probably be okay. They weren’t anything special, but sometimes regular old fries are just what you want. Having just another couple fries shouldn’t be a problem, I thought, and snagged a few more. Then a few more. Unfortunately, my continued fry pilfering did not go unnoticed. In a calm and pleasant voice, Shawn said, “I thought you didn’t want any fries.” At least I think that’s what she said, because the words I heard inside my head were “If you touch my food again, I will nail your skin to the Stanford tree mascot.” Regardless of what the exact statement was, I felt it was best to focus my appetite elsewhere.

Perfectly crispy but otherwise uninspiring fries. Then again, what else do you really need?

Perfectly crispy but otherwise uninspiring fries. Then again, what else do you really need?

To my delight, I suddenly remembered that I had ordered a patty melt. Hooray! This diner classic is one of my favorites and one I am always looking for. It’s a tricky dish to get right, and all too often the bread turns into a soggy mess where it touches the hamburger patty… but not at Gott’s. The toasty rye bread was crisp and un-collapsed, the whole grain mustard was fantastic, and the grilled onions were flat-out amazing. And the cheese! I give Gott’s a huge thumbs-up for choosing Gruyere as the “melt” part of the patty melt. It was the highlight of the meal for me.

A patty melt! Surprisingly hard to find, but Gott's has them.

A patty melt! Surprisingly hard to find, but Gott’s has them.

We finished up our meal pleasantly satisfied but not overly full, and we agreed that Gott’s Roadside rocks. They somehow seem to have exactly what you want on the menu, and they do a great job of not screwing it up in the kitchen. The quality of the ingredients and preparation receive high marks, as do the speedy service, reasonable bill, and clean dining area. Gott’s may not knock you on your ass in sheer awe, but if you want a great, hiccup-free experience and some tasty grub then this is the place for you. I rate Gott’s an extremely solid 13 out of 14 stolen french fries, more than good enough to justify many repeat visits. Just don’t take El Camino to get there.

Gott’s Roadside
Multiple locations around the Bay Area
www.gotts.com

Gott's Roadside on Urbanspoon


There's a little something here for everybody.

There’s a little something here for everybody.


Standard Restaurant Review Disclaimer
The ambiguous and illogical rating system used in this review is not intended to be pinpoint accurate. It’s only there to give you a general idea of how much I like or dislike an establishment, and it also gives me an excuse to write silly things. If my rating system angers and distracts you, there’s a good chance you have control issues. I would also like to point out that I am not a highly qualified restaurant reviewer person, nor do I particularly care what that job is called. If you were under the impression that perhaps I was one of those people, consider your hopes dashed. Lastly, wow! You read the entire disclaimer. You get a gold star on your chart today.


Slow cooker chicken stock

There are a lot of reasons to make your own chicken stock. Maybe you’re a cheapskate, or maybe you prefer the taste of homemade stock to the canned stuff. Perhaps you simply enjoy tinkering in the kitchen and making a mess. Why do I make my own stock? For one, I can’t stand the idea of throwing away perfectly good leftover chicken parts. There’s a lot of flavor lurking in a roast chicken carcass, and I feel like it’s worth the effort to coax it out.

Skip to the short version

” Use it straight up for full frontal chicken intensity “

Technically “broth” is made using meat and “stock” is made using bones, but I’ve always used the word “stock” because it makes me sound more like I know what I’m talking about… which may or may not be true. There are quite a lot of different ways to make this stuff, but this is the recipe I like best. It’s dead easy and it turns out great-tasting results.

You can use stock for an extra flavor boost when making rice, and it’s great for steaming vegetables. Stock is perfect for deglazing pans, making all manner of gravies and sauces, and of course it’s a core ingredient of soup. Polenta made with chicken stock is miles better than its boring water-based cousin. The list goes on and on. Intrigued? Good, let’s start cooking.

A handful of leftover ingredients is all you really need.

A handful of leftover ingredients is all you really need.


Ingredients

  • 1 or 2 chicken carcasses (or a bunch of leftover parts), lightly killed
  • 2 carrots
  • 2 celery ribs
  • 1 medium onion
  • 2 garlic cloves
  • 2 bay leaves
  • a few sprigs of fresh thyme (optional)


Directions

Ok, first step. Go to the store, buy a rotisserie chicken, eat it, and save the bones, skin, and other unpleasant parts. Do this twice. You should now have more or less the requisite amount of carcass bits to move forward with this recipe. If you like to roast your own chickens, and you really should, this first step will be even easier. At the risk of stating the obvious, all of your chicken should already be cooked. Also, do not – I repeat, do NOT – use giblets when making chicken stock. You know those nasty little bags of bird guts that are stuffed inside whole, raw chickens? Those are giblets. I’m sure there’s someone out there that enjoys the flavor of boiled organs, but it’s not me. Save yourself from the horror and shame of accidentally making liver soup and skip the giblets.

Hot Tip: Keep a couple of gallon ziplock bags in your freezer – one for chicken carcasses and one for veggies. Save all those carrot tops, celery ends, and unused onion layers and stick them in the freezer instead of throwing them away; do the same with various chicken parts. Not only will you waste less food, but you’ll always have stock-making supplies on hand.

The next step is pretty easy. Take all of the ingredients listed above, frozen or otherwise, and throw them into your slow cooker. If you have a smaller slow cooker and don’t think everything will fit, just halve the recipe. There’s no particular need to cut up the vegetables, but if you prefer you can give everything a coarse chop before tossing it in. You should ideally have enough chicken parts to fill your slow cooker completely. Fill with water up to about 1″ below the rim of the cooker, put the lid on, set it to ‘low’, and leave it alone for 24 hours. If you’re in a hurry, you can cook it on ‘high’ for 12 hours instead.

All cooked. We're on the verge of chicken stock greatness here.

All cooked. We’re on the verge of chicken stock greatness here.

Your stock is all done and it should smell of delicious chickeny goodness. Now, in whatever way seems best to you, separate the bones and other remaining solid stuff from the liquids. I like to dump the whole mess into a large, fine-mesh metal strainer and catch the liquid in a large bowl, but you can also use a slotted spoon or collander or whatever you have handy. Throw away the solids, step back, and admire the deep, rich color of the homemade chicken stock that has magically appeared in your kitchen.

If you own a fat separator, now is a good time to use it.

If you own a fat separator, now is a good time to use it.

Now it’s time to store all that dandy chicken tea you’ve just brewed up. There are a number of different ways to tackle this, but my favorite method is to pour 2-cup portions of the stock into quart freezer bags and freeze them while laying flat. Once frozen, they will stack neatly on a freezer shelf, ready for use. For convenience, I also like to fill a couple of ice cube trays. One frozen cube of stock is exactly 2 tbsp; it’s quick, neat, and easy to measure out exactly what you want when the need arises.

Great for cooking, not recommended for cocktails.

Great for cooking, not recommended for cocktails.

And that’s it! You’ll find that your scratch made stock is 3.7 times chicken-y-ier than store-bought.* You can use it straight up for full frontal chicken intensity, or cut it 1:1 with water to bring it down to the level of stock mere mortals are accustomed to. Go ahead and pat yourself on the back, enjoy a tasty beverage, and brag to your friends about how awesome you are.

*Measurements of chicken intensity are approximate and intended only to serve as a vague reference point to lend credibility to this blog post. There is also no scientifically proven method to debunk the aforementioned chicken intensity claims, so if you were thinking of doing so, I say to you: Neener neener.

Not a bad day's work.

Not a bad day’s work.


tl;dr

Slow cooker chicken stock

Ingredients

  • 1 or 2 chicken carcasses
  • 2 carrots
  • 2 celery ribs
  • 1 medium onion
  • 2 garlic cloves
  • 2 bay leaves
  • a few sprigs of fresh thyme (optional)


Directions

Fill crock pot with chicken carcass parts. Rough cut vegetables and add to crock pot with other ingredients. Cover with water and cook for 24 hours on low. Separate bones and other solids from stock and discard. Refrigerate or freeze stock when cooled.


See also


Standard Recipe Disclaimer
I don’t come up with a lot of my own recipes (unless you count my own personal milk-to-Grape-Nuts ratio), and chances are the recipe posted above belongs to or was inspired by a person other than me. So if you’re wondering whether or not I ripped somebody off, I probably did. Don’t get out the pitchforks and torches just yet though! I want to make absolutely sure I give credit where it’s due, so if you think someone deserves recognition for something that I haven’t already called out FOR CRYING OUT LOUD LET ME KNOW. Thanks, I appreciate it. Here’s a cookie.