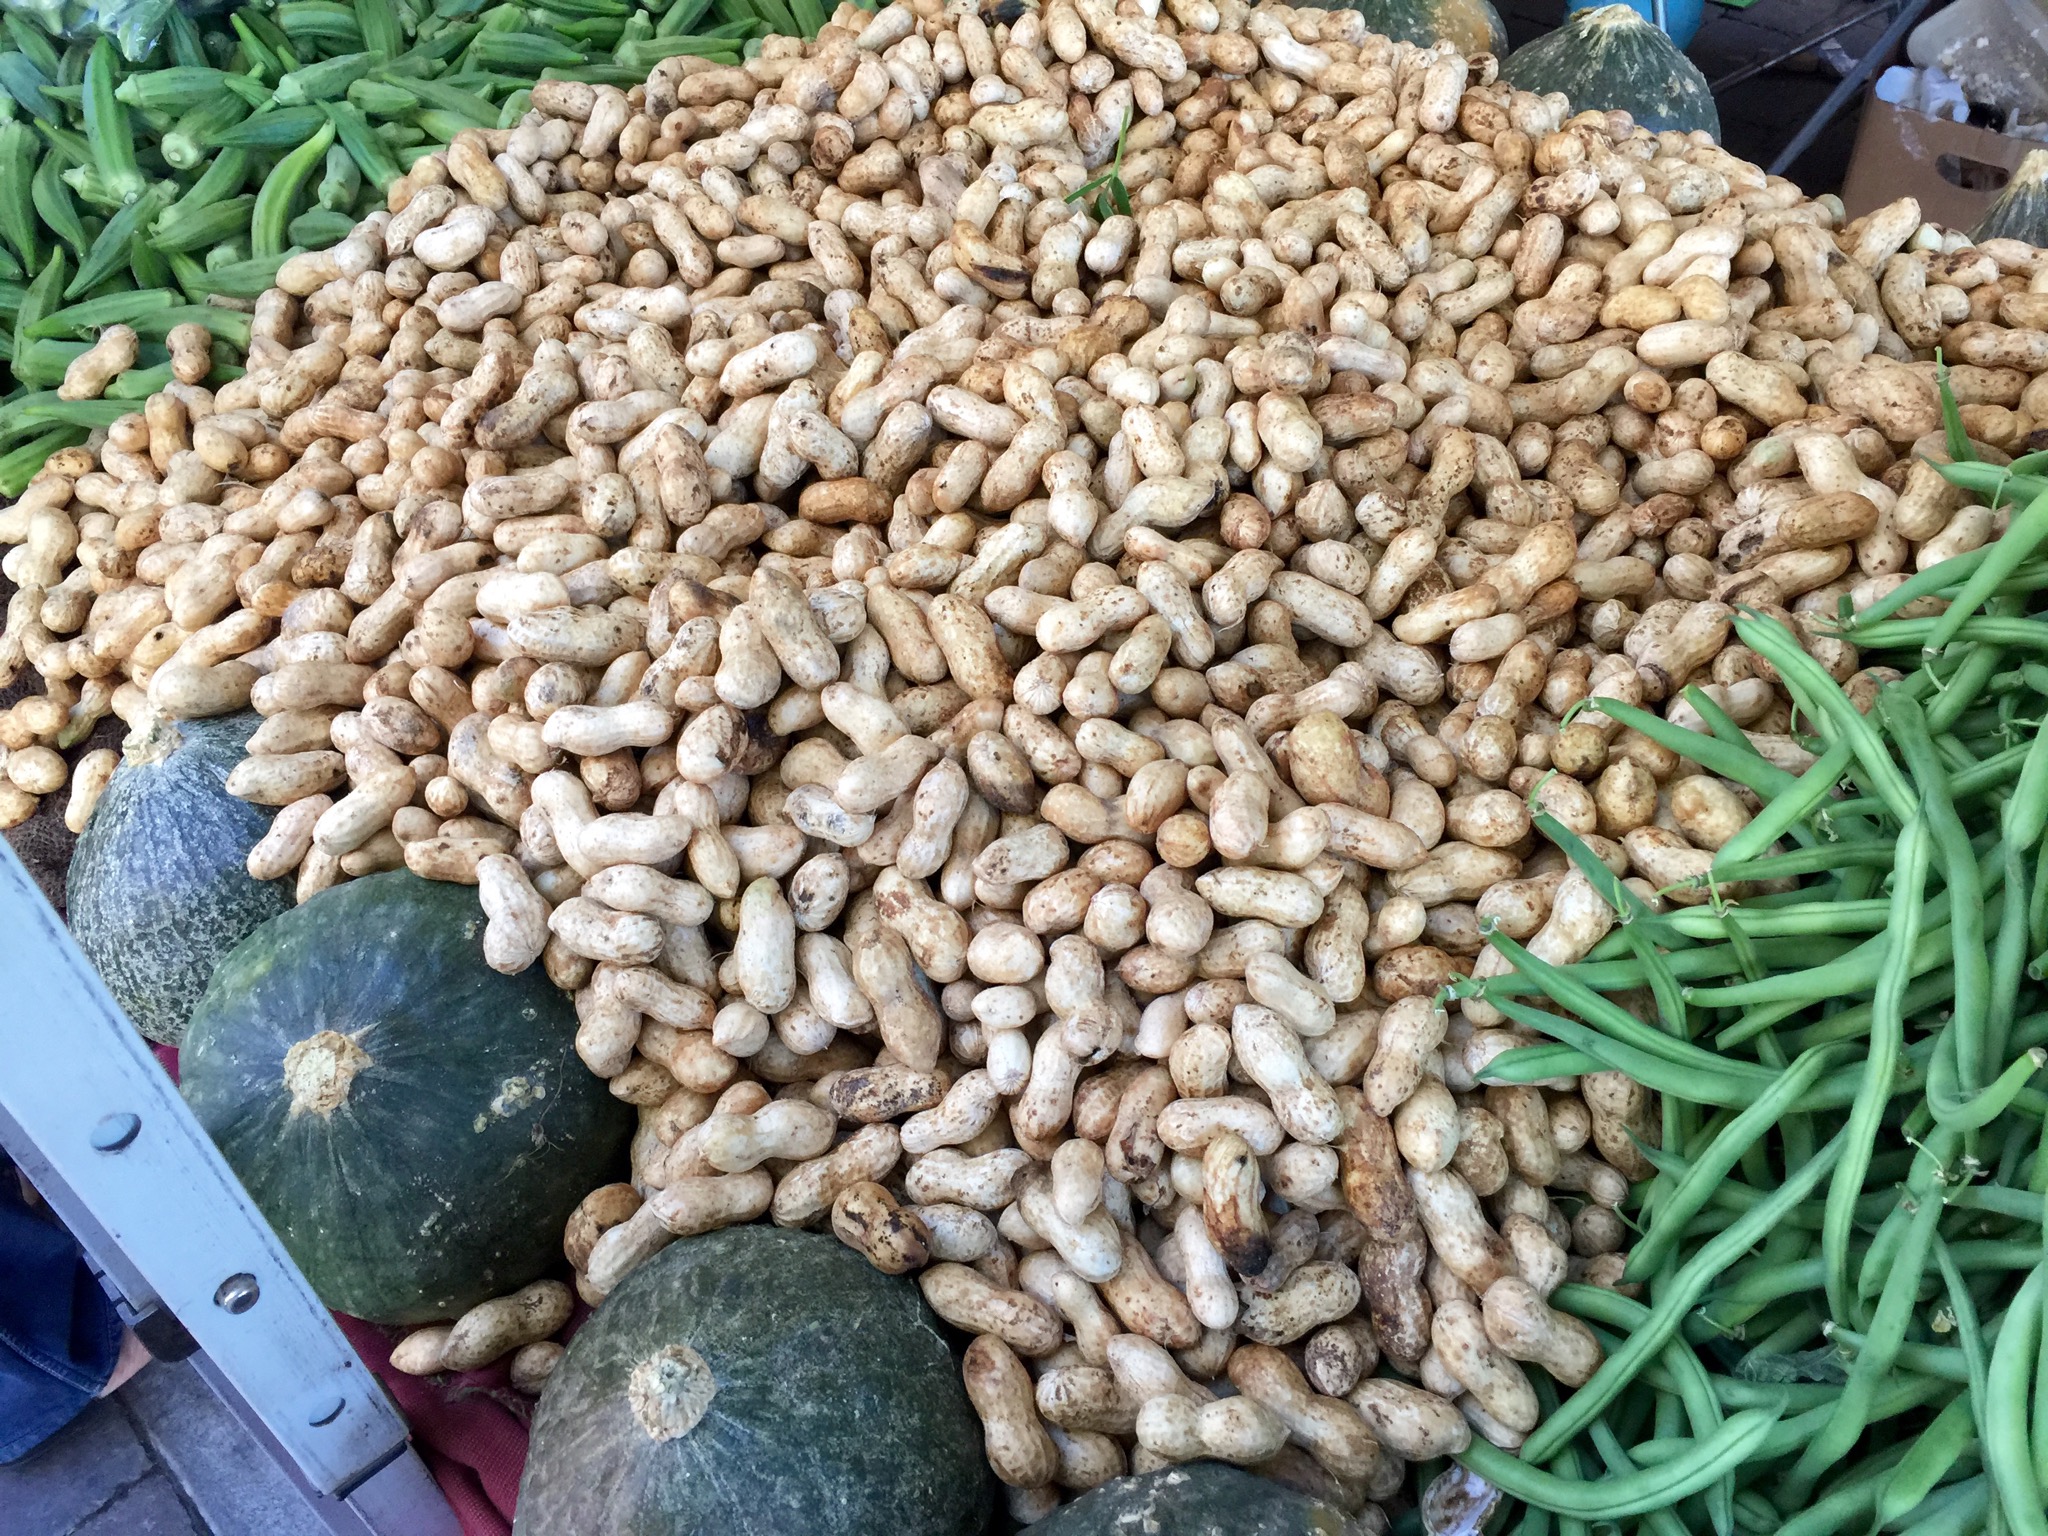
Somewhere over the course of my childhood, I developed a taste for boiled peanuts. Maybe it was that year I lived in Georgia as a toddler, or maybe it was that southern neighbor of ours in Massachusetts. Regardless, I still crave boiled peanuts to this very day and dream about them far more than I care to admit. They’re like a cross between chick peas and roasted chestnuts, bean-like but also decidedly peanutty. I call them “redneck edamame“. When cooked properly, they have a wonderful soft and slightly chewy texture. I freaking love the things. Most other people I know, however, don’t.
Skip to the short version
” There are a number of redneck activities you can occupy yourself with while you wait “
I’m not going to lie to you. If you’re curious whether or not you will like boiled peanuts, you probably won’t. I only know a handful of people who like them, myself included. Many of these people herald from India, where I am told boiled peanuts are a relatively common street food. Aside from that, I know one Texan who likes boiled peanuts and three or four folks from the Carolinas who grew up eating them. Everybody else I know, my Texan wife included, think that boiled peanuts are all kinds of icky.
There. That concludes my disclaimer. If you make this recipe and decide that you hate boiled peanuts, you have only yourself to blame. Now that we’ve weeded out all the wimps, let’s get cooking!

Who wants to make a peanut angel with me?
Ingredients
- 2 lbs raw peanuts
- 1-2 quarts water
- 1/2 cup table salt (or 1 cup Kosher salt)
Other stuff you’ll need
- a crock pot or large stock pot
- something to do for twelve hours
Directions
If it wasn’t so tricky to find raw peanuts, this would pretty much be the world’s easiest ingredient list. Raw peanuts usually start showing up at my local farmer’s market in late September and disappear again in December. You can also find them at Asian markets and/or in any decent-sized Chinatown. Once you finally locate some raw peanuts, buy a pile of them. I usually get two pounds at a time because that’s what will fit in my crock pot.

Be sure to wash your n… uhm… I mean produce. Be sure to wash your produce.
Take that lovely pile of peanuts and wash the bejiminy out of them. Peanuts grow in dirt. Nobody likes eating dirt. Wash harder. When the rinse water runs clear, the peanuts are about as clean as you can get them.
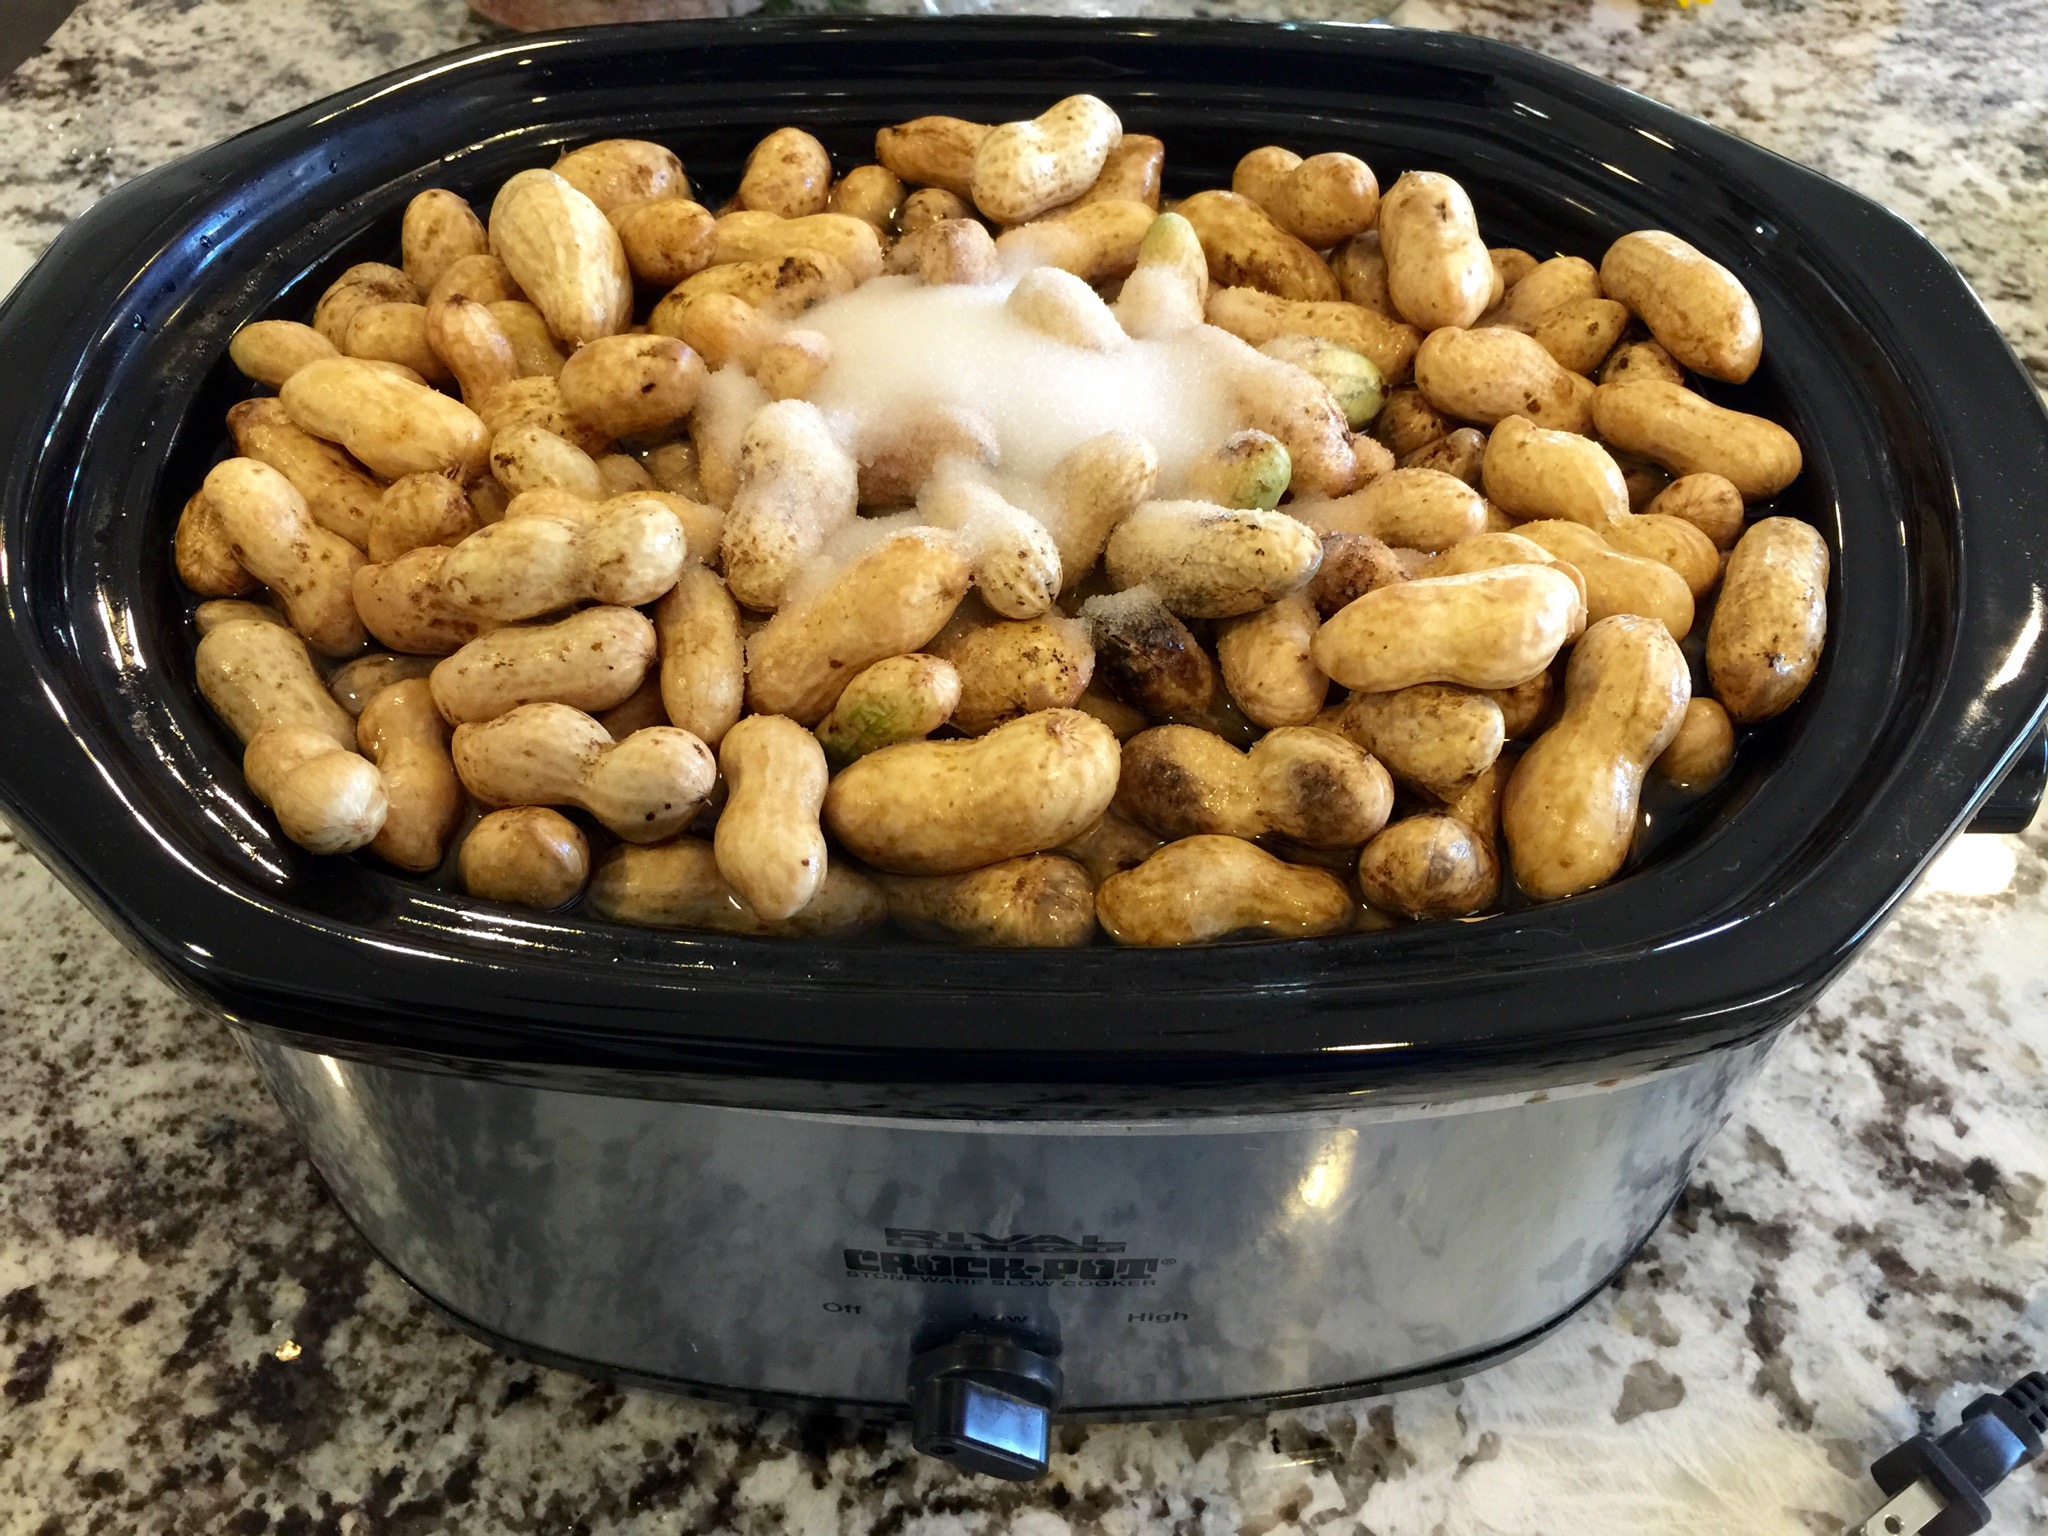
The general idea at this point is to simmer the peanuts all day long in salty water, which can be accomplished in a number of different ways. A pot on the stovetop works just fine, but I prefer using a slow cooker. Dump the peanuts into whatever cooking thingy you choose, cover with water, and add the salt. Bring the resulting brine water to a boil, turn down the heat to medium-low, cover, and simmer for about eight to ten hours. If you’re using a crock pot, set the selector to ‘high’ and let it go for about twelve hours.
The salt ratio is a tricky thing to get correct, partly because everybody prefers slightly different amounts of salt, but also because the amount of water you need varies depending on the shape of your cooking vessel. The best advice I can give is to wait until the brine water is simmering and then taste a tiny spoonful of it. It should be salty but not repulsive, say a little bit less salty than ocean water. However salty the brine tastes is how salty the peanuts will be. Adjust the salt and water ratios accordingly, but do it early and do it ONLY ONCE.

Everyone in the pool!
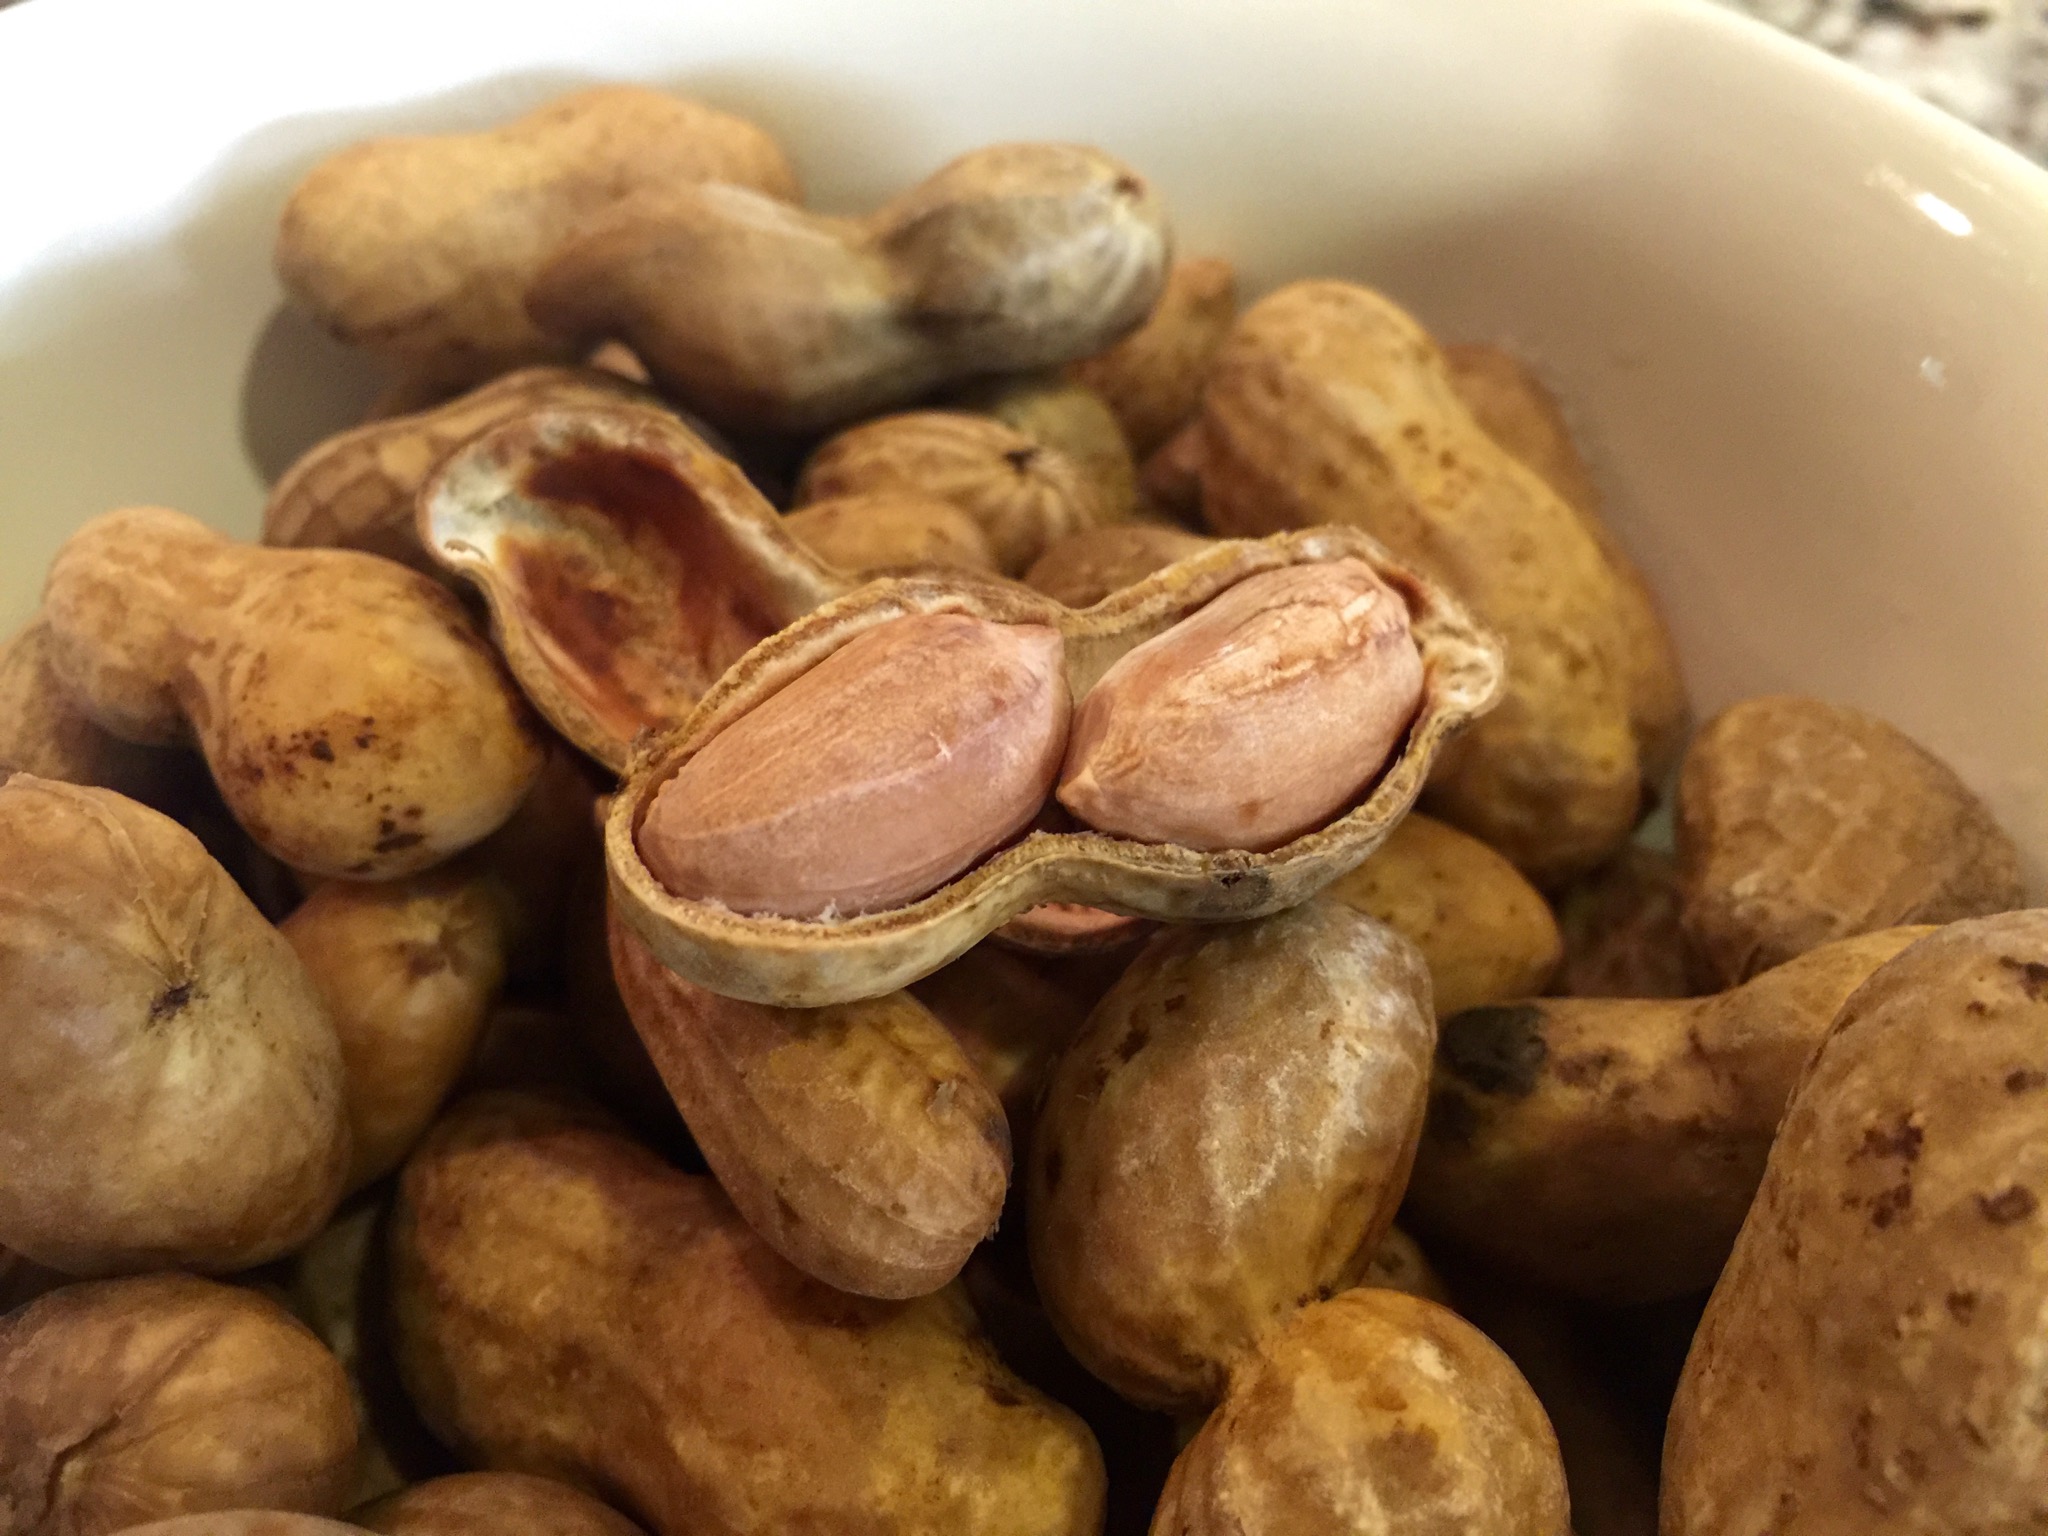
So, how do you know when the peanuts are done? Well… uh… They certainly shouldn’t be crunchy at all, that’s for sure. If they crunch, they need to cook another few hours at least. They also shouldn’t be über-mushy, but rather somewhere halfway in between. It’s worth noting that you should not be alarmed at the apparent blandness of the peanuts as you taste test them. In my experience, the salt only seems to work its way into the nuts during the last 10% of the cook time or so. I have ruined more than one batch of boiled peanuts by panicking and adding more salt at the last minute, only to have the batch turn out lip-puckeringly over-brined. Don’t be a me.
There are a number of redneck activities you can occupy yourself with while you wait the twelve-ish hours it takes your peanuts to become boiled. You can build a potato gun, watch reruns of Honey Boo Boo, make a hammock out of duct tape, or go mattress surfing. When you’ve finished cleaning the mud out of your hair and replacing any teeth you’ve lost, you’re ready to enjoy a true redneck delicacy.
Note: If you like boiled peanuts and you’re not a redneck, I have probably just offended you. Stop being so sensitive.

I sure do love me some boiled peanuts.
Remove the peanuts from the brine and eat them hot. Delish! Whatever’s leftover will keep for about a week in the fridge, or many months in the freezer. If you’ve discovered that you do indeed like boiled peanuts, you might also want to try Cajun style. Throw a couple bags of Zatarain’s Crab Boil seasoning in the brine along with a jar of pickled jalapeños, juice and all, and you’re good to go.
tl;dr
Boiled peanuts
Ingredients
- 2 lbs raw peanuts
- 1-2 quarts water
- 1/2 cup table salt (or 1 cup Kosher salt)
Other stuff you’ll need
Directions
Wash peanuts thoroughly in cold water and place in crock pot. Cover with water, add salt, and cook on high for 12 hours. For Cajun style, add two bags of Zatarain’s Crab Boil and a jar of pickled jalapenos to the brine mixture.
See also
Standard Recipe Disclaimer
I don’t come up with a lot of my own recipes (unless you count my own personal milk-to-Grape-Nuts ratio), and chances are the recipe posted above belongs to or was inspired by a person other than me. So if you’re wondering whether or not I ripped somebody off, I probably did. Don’t get out the pitchforks and torches just yet though! I want to make absolutely sure I give credit where it’s due, so if you think someone deserves recognition for something that I haven’t already called out FOR CRYING OUT LOUD LET ME KNOW. Thanks, I appreciate it. Here’s a cookie.

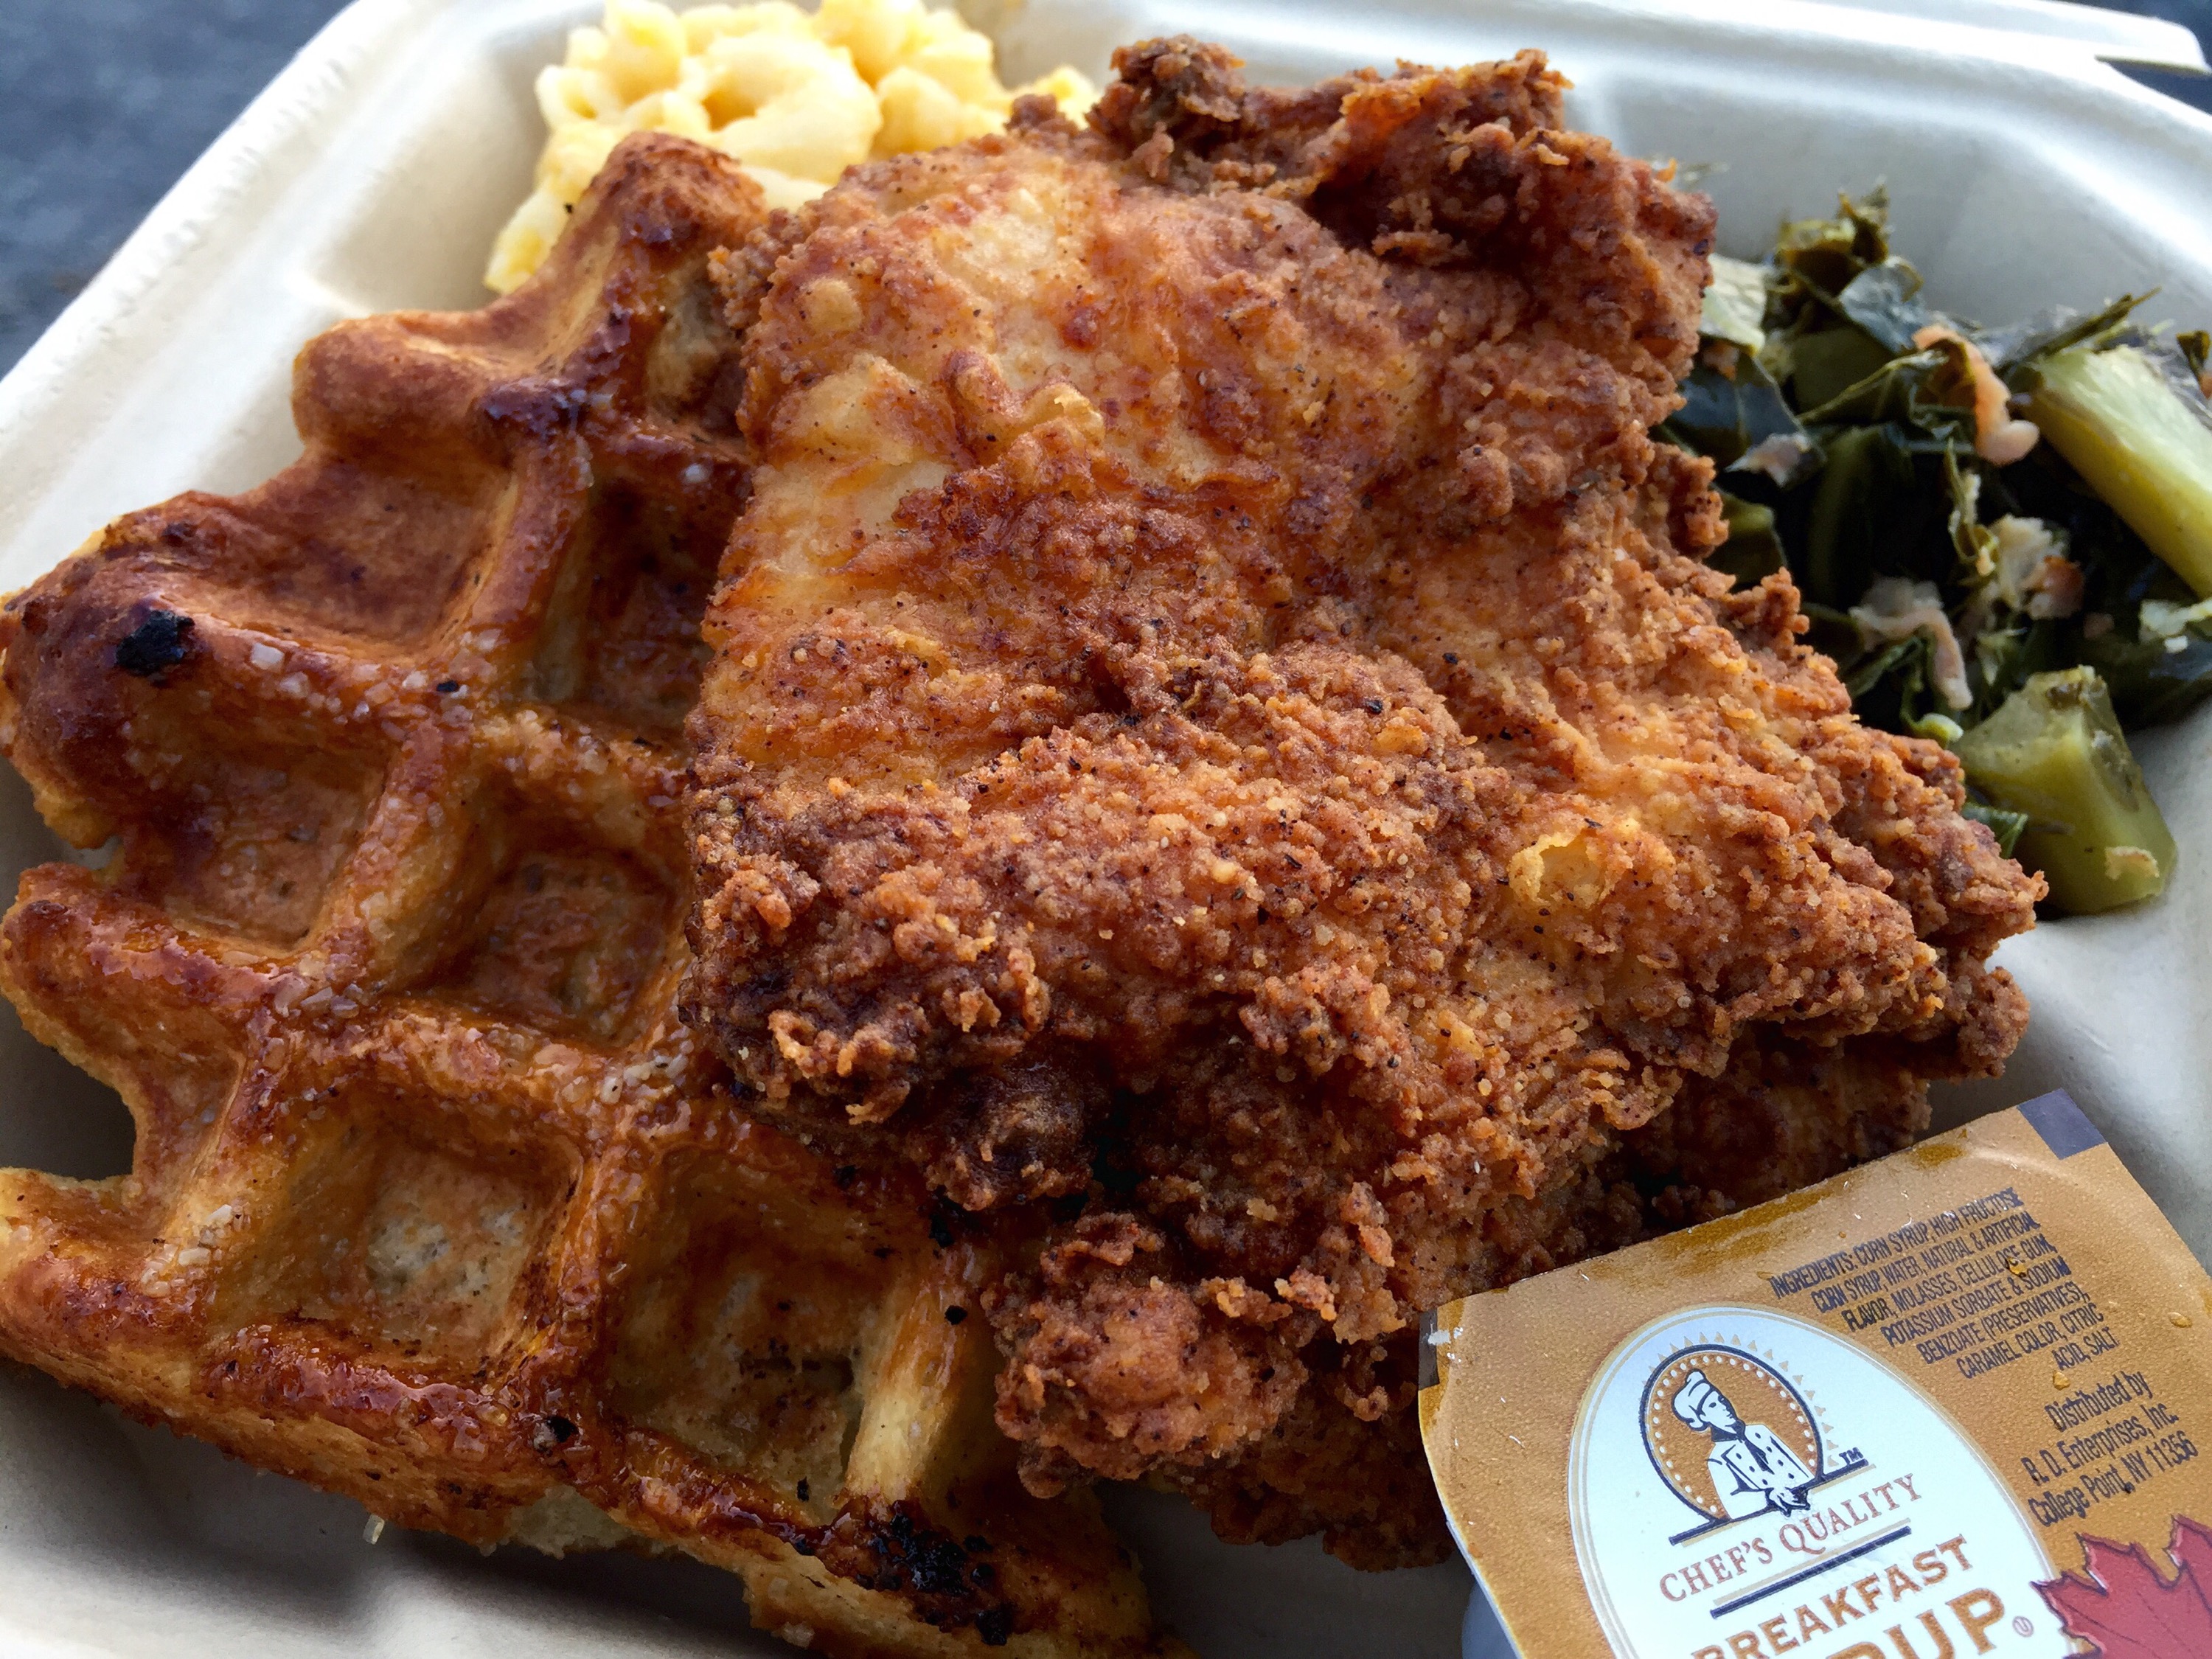
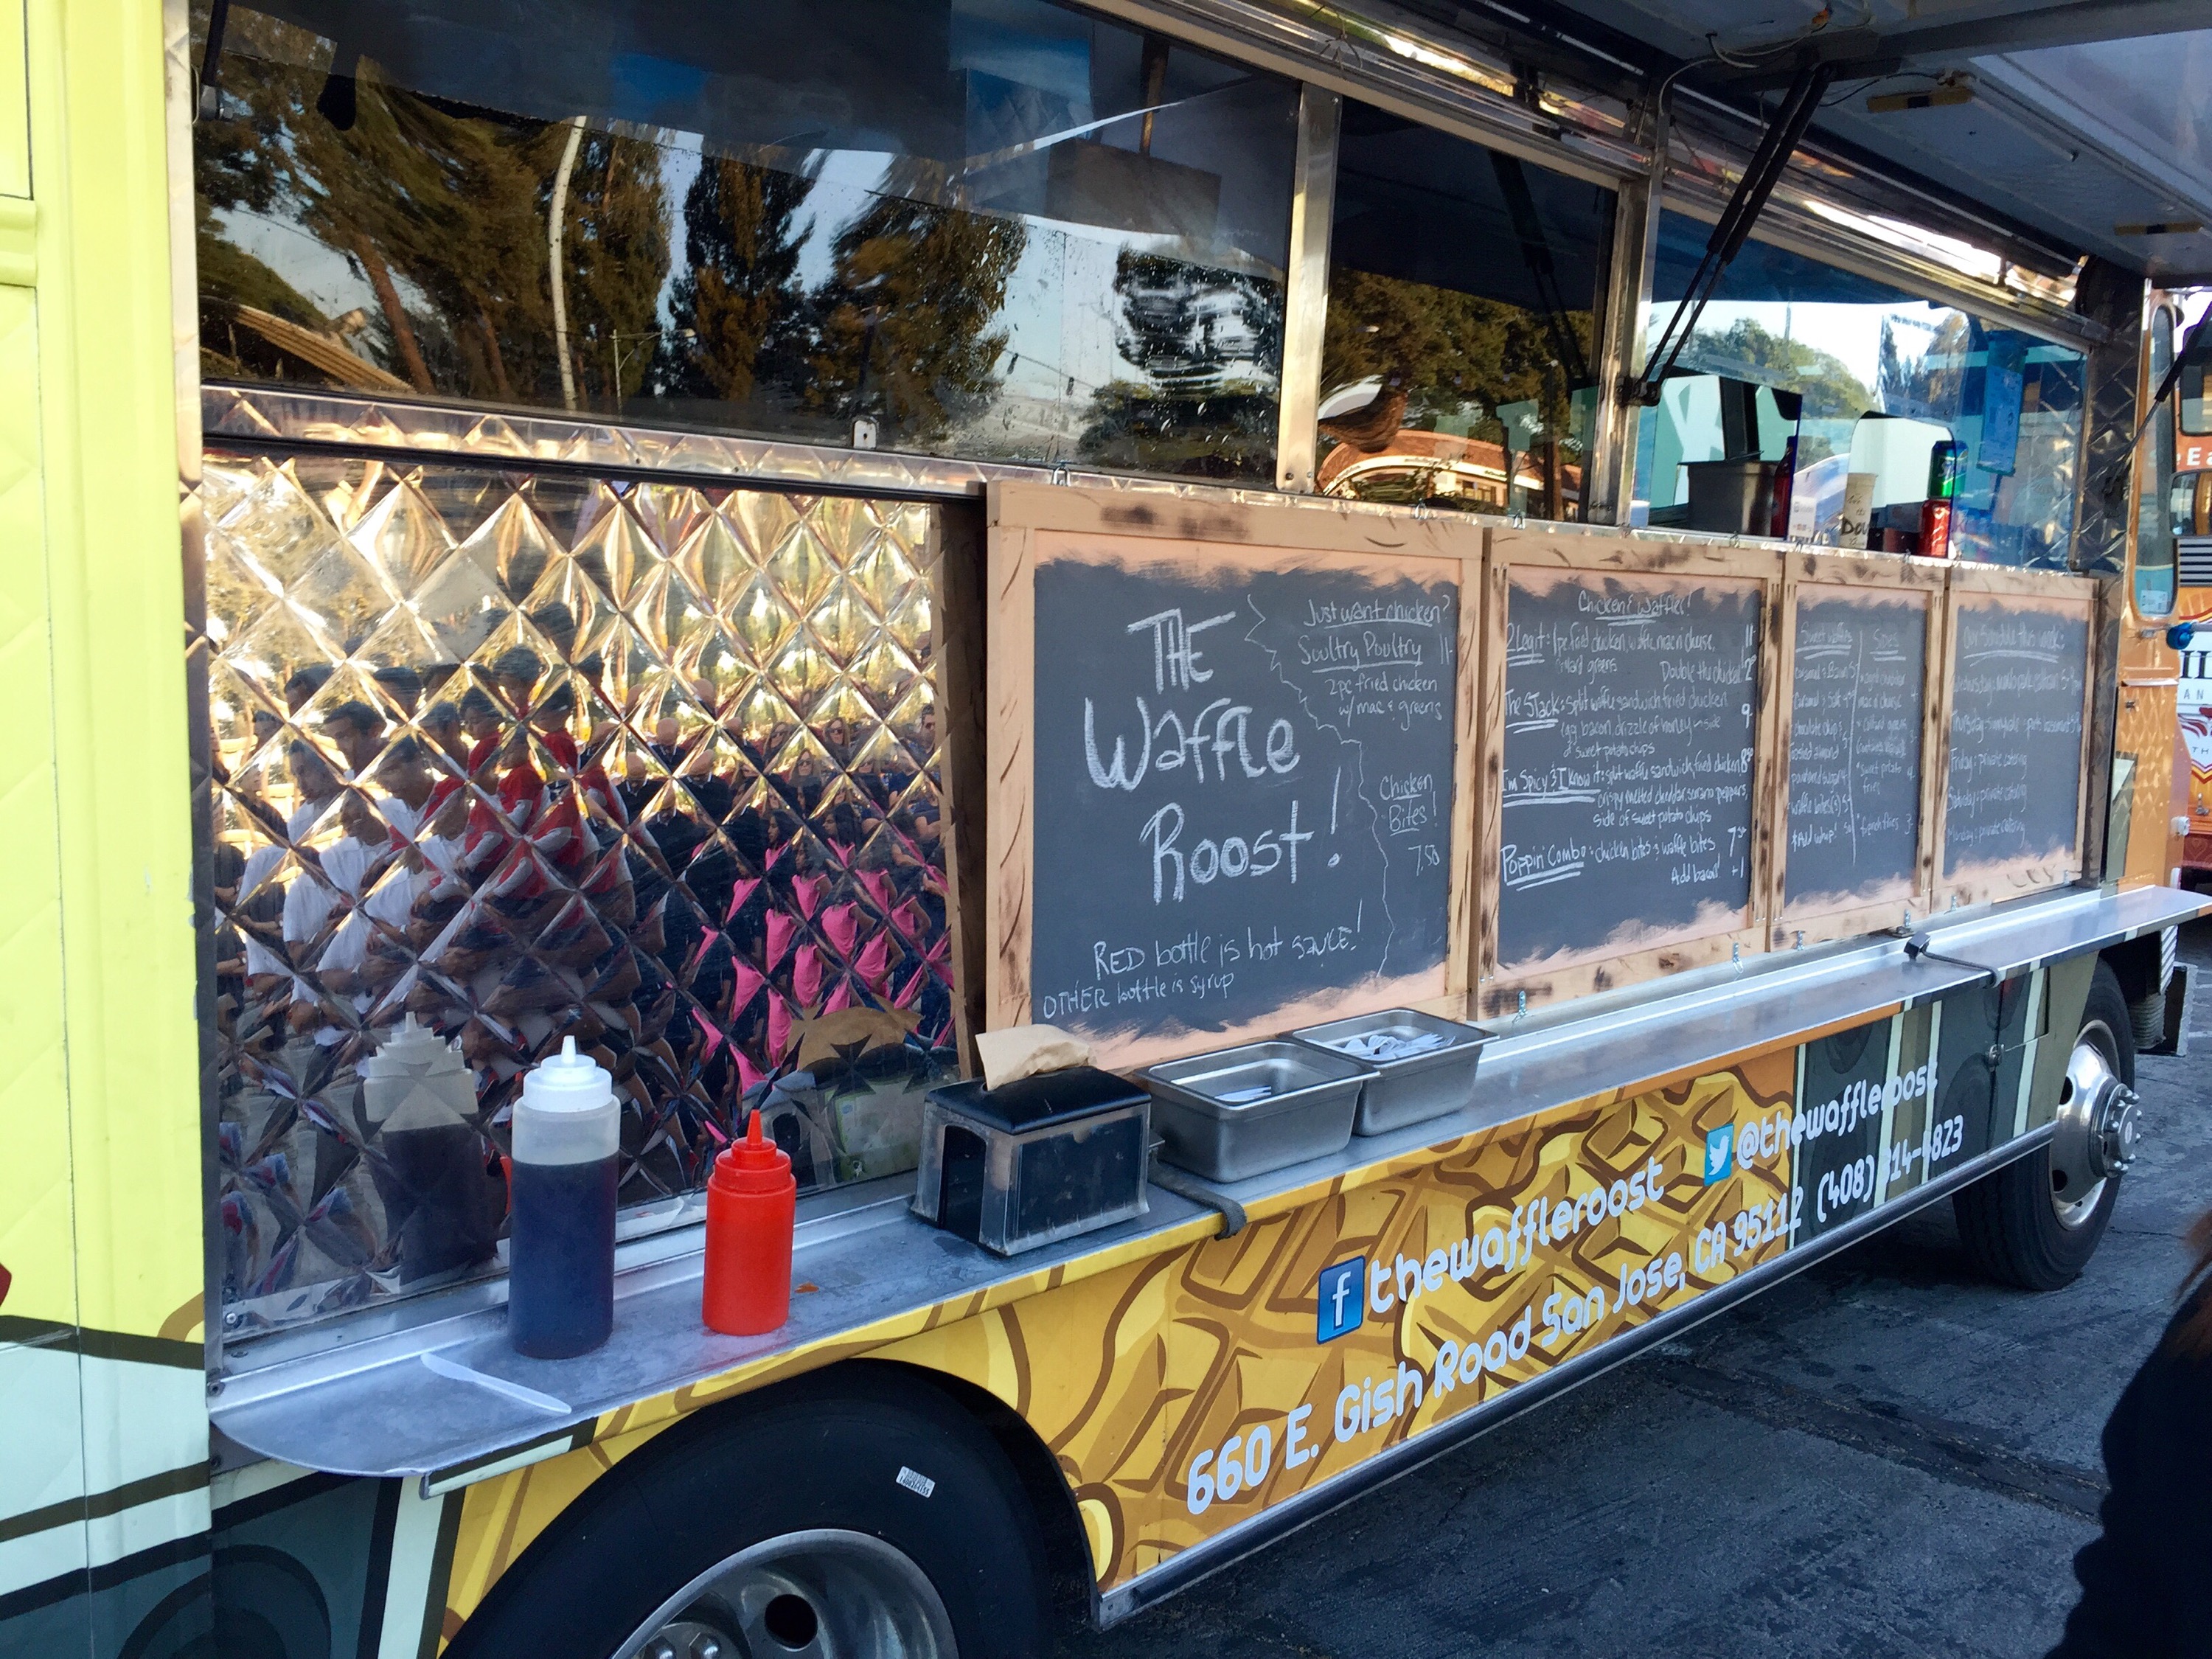
 Every food truck needs to have some kind of theme, gimmick, or unique idea in order to attract attention. The Waffle Roost truck, as you might guess from the name, features chicken and waffles. While this isn’t a new or original idea, Waffle Roost just so happens to be the only one in the area serving up this deliciously weird combination. It’s one of those things that for whatever readon, just works.