Oh Boba!

meter-good-greatAgainst all odds, I’m a big fan of bubble tea. I usually don’t like squishy things, and I absolutely detest weird gunk floating around in my drinks… and that just about exactly describes what bubble tea is. For a slightly more specific definition, I decided to plagiarize Wikipedia:

Bubble tea, also known as pearl milk tea or boba milk tea, is a Taiwanese tea-based drink invented in tea shops in Taichung, Taiwan, during the 1980s. Most bubble tea recipes contain a tea base mixed with fruit or milk. Ice-blended versions are usually mixed with fruit or syrup, resulting in a slushy consistency. Most bubble teas come with small chewy tapioca balls (粉圓, fěnyuán), commonly called “pearls” (珍珠, zhēnzhū) or “boba” (波霸, bōbà).

Why exactly I like this stuff so much I have no clue, but it seems I’m not alone in the world. When I discovered that Oh Boba!, an independent non-chain bubble tea shop, was opening right down the street, I was pretty excited.

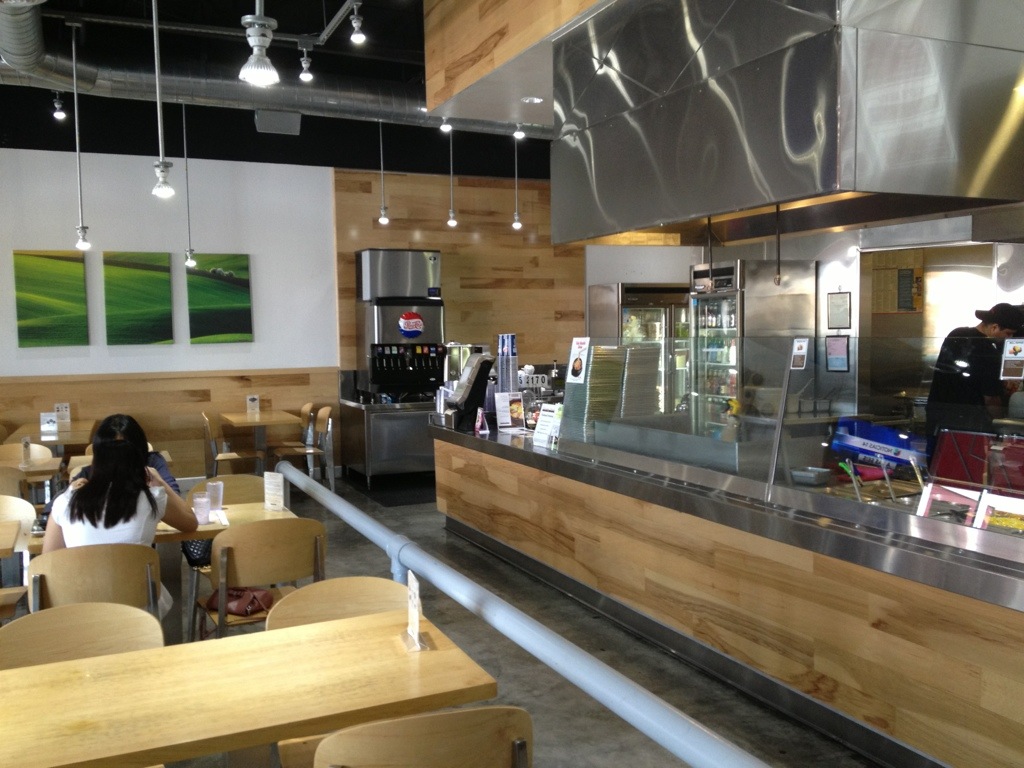
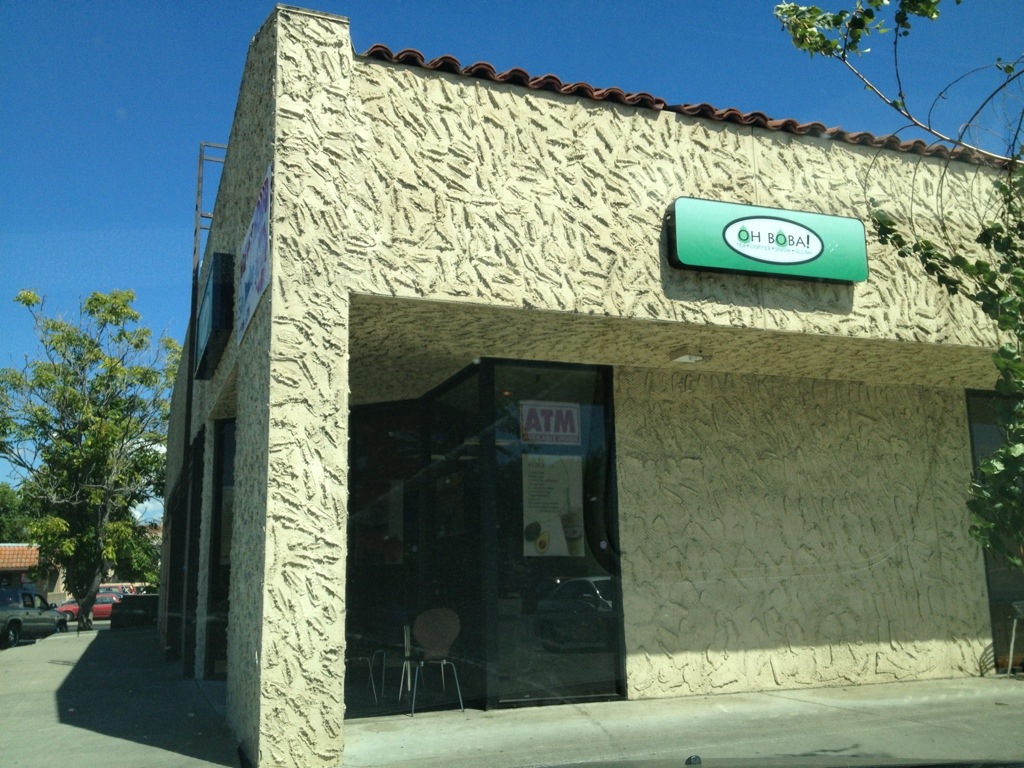
This shop is located more-or-less right across the street from Santa Clara University, and for that reason alone I am confident that they’ll do just fine as a business. Oh Boba! is not a very large establishment but the interior is neat and clean, if not a bit spartan, and the staff is always friendly and attentive. The outside of the building, unfortunately, is quite hideous; please do not let that fact deter from you visiting. The vast ugliness of the structure is of course the fault of the property’s landlord, in whose general direction I scoff repeatedly. This building has literally the worst stucco I have ever seen. It looks like a cement truck exploded inside a roller disco.

It's a rock climbing wall! No, it's a fingerpainting!

It’s a rock climbing wall! No, it’s a fingerpainting!

” It looks like a cement truck exploded inside a roller disco “

Once inside, thank goodness, you will see a huge menu of drinks (as is the way of most bubble tea shops) and a handful of food items as well. You can choose from hot or cold beverages, slushes, snow (like a slush, only with milk), and a variety of teas. They also make a wickedly strong Vietnamese iced coffee which contains enough sugar and caffeine to make you run laps around the ceiling. It’s divine. I also highly recommend trying a strawberry banana slush, and the chocolate snow is very good as well. Oh, and don’t forget the regular old milk tea, that’s awesome too. Come to think of it, just try everything.

I don't understand how the lids work.  It's witchcraft.

I don’t understand how the lids work. It’s witchcraft.

Prices are just shy of five bucks a drink, which is pretty standard for this sort of thing. The high quality of the beverages more than makes up for the sting in your wallet, and you can also get a buy-ten-get-one-free card going while you’re there.

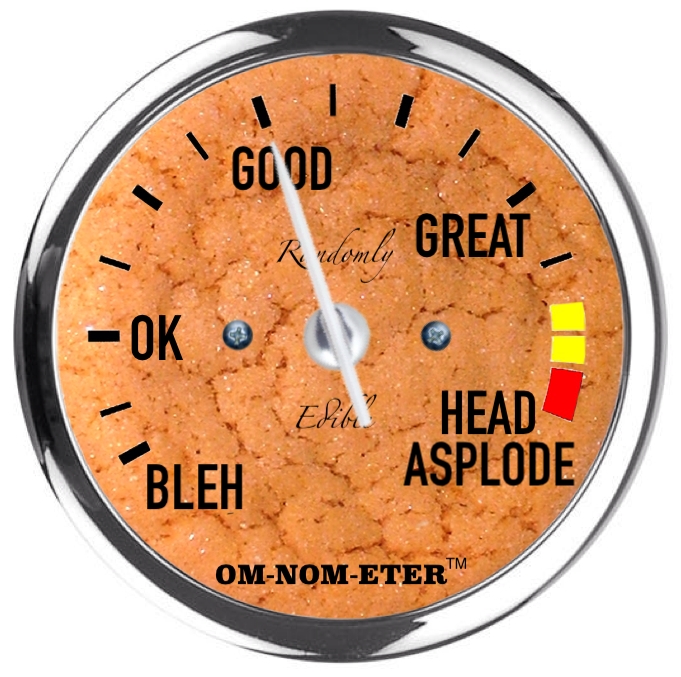
I rate Oh Boba! a stellar 262 Strange and Delicious Chewy Things In My Drink out of a possible 298, making it very much worth anybody’s while to give this place a try.

Oh Boba!
1000 Lafayette Street
Unit F
Santa Clara, CA 95050
(408) 248-1289
www.ohboba.com
Oh Boba! on Urbanspoon

It's fruitier than eating Carmen Miranda's hat.

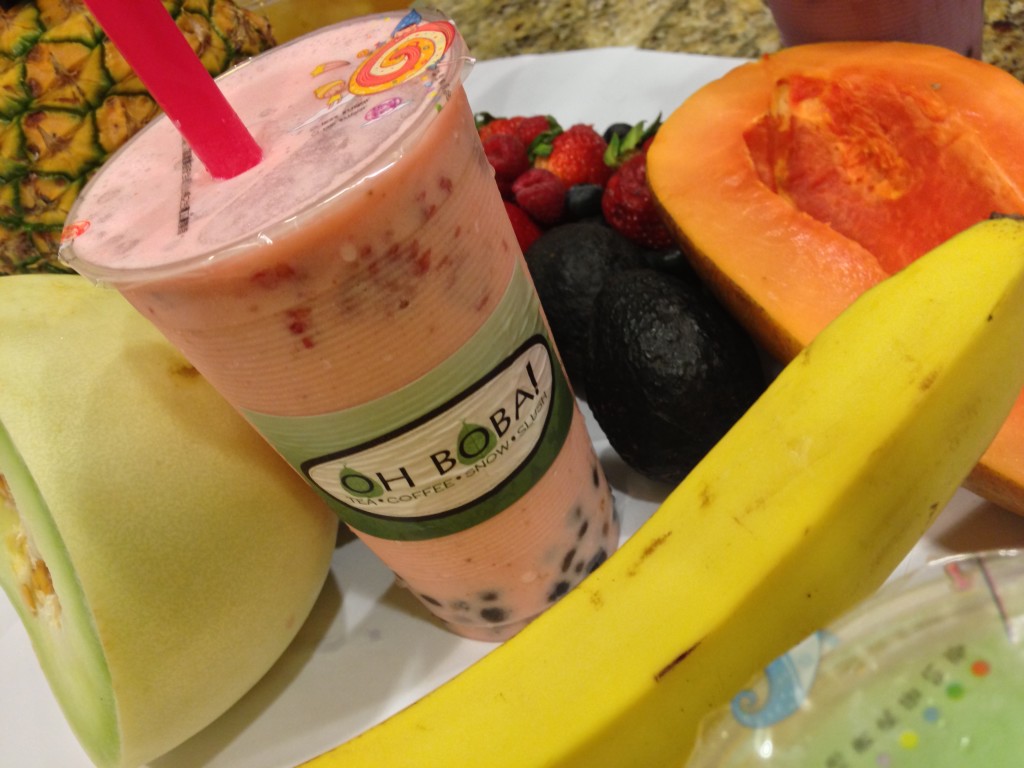
It’s fruitier than eating Carmen Miranda’s hat.


No-bake peanut butter bars

I have met people who claim that they don’t like peanut butter. Allergies are one thing, but simply not liking it? Ridiculous. I assume these same people enjoy pulling the wings off of butterflies and farting in elevators, and I want nothing to do with them. This recipe is not for those people, it’s for the rest of the normal humans in the world who love the bejeepers out of some PB.

Skip to the short version

” Nobody wants your fingers in their dessert. Focus.”

This is another one of those recipes of which there are a thousand slightly different versions, and nobody knows who came up with it first. The first time I came across this recipe was on this website; I have adjusted the preparation and some of the quantities slightly. The real beauty of this recipe is its simplicity, ease of preparation, and minimum number of ingredients. An added bonus is that the finished product is maddeningly delicious and will throw you into an immediate sugar-and-peanut-butter induced coma.


Ingredients

  • 2 1/4 cups graham cracker crumbs (about half a box of crackers)
  • 1/4 cup brown sugar
  • 1 cup powdered sugar
  • 1 cup salted butter, melted
  • 1 cup peanut butter
  • 1/2 tsp vanilla
  • 1 bag chocolate chips (11oz)


Directions

Take a bunch of graham crackers and smash the crap out of them. You can use a blender or a food processor, but I find that a plastic bag and a wooden spoon work just fine. Leave the peanut butter alone – don’t eat any of it. I know it’s tempting, but just put it somewhere out of sight for now. Where were we? Graham crackers. Once you have pounded two cups of crumbs into oblivion, dump them into a big bowl. Add the brown sugar and powdered sugar and whisk together thoroughly.

Stop eating the peanut butter. Stop it. You won’t have enough for the recipe if you’re going to be a little piggy.

Melt the butter and add it to the dry ingredients, and add the vanilla as well. Yes, you are allowed to touch the peanut butter now. Add a cup to… No. To the bowl, not your face. I’m serious. It goes in the bowl. There, I knew you could do it. Stir everything up until it’s an even consistency and scoop it into an ungreased 9×13 baking dish.

Oh sweet, sweet heavenly peanut butter mixture. You speak to me.

Oh sweet, sweet heavenly peanut butter mixture. You speak to me.

Melt the chocolate chips in a double boiler. If you don’t have one of those then carefully CAREFULLY melt them in the microwave. It’s a surprisingly tricky business. Use half power and nuke for one to two minutes tops, monitoring closely. I recommend stopping every 20 seconds or so and giving the chips a stir to see how they’re doing. Once the chips are mostly melted (but there are still a few solid chunks) they are done. Just keep stirring until the remaining solid bits melt and you’re good to go.

Listen to me. Put the peanut butter jar down. No more for you. None. And stay out of the chocolate. Nobody wants your fingers in their dessert. Focus.

My chocolate senses are tingling.

My chocolate senses are tingling.

Using a rubber spatula-scraper-thingy, spread the ooey melted chocolate evenly on top of the layer of pure peanut buttery heaven. Go slowly and do your best not to get any peanut butter bits in the chocolate or else all your friends will know you’re incompetent, and they will point and laugh at you in mockery. (Note: If this situation occurs, tell your friends they can go get bent and that you’ll keep all the peanut butter bars for yourself.)

Refrigerate for at least an hour. Cut, serve, gloat, and enjoy the sugar coma.

Nobody cares if you cut them straight or not. They're just interested in the peanut butter.

Nobody cares if you cut them straight or not. They’re just interested in the peanut butter.


tl;dr

No-bake peanut butter bars

Ingredients

  • 2 1/4 cups graham cracker crumbs (about half a box of crackers)
  • 1/4 cup brown sugar
  • 1 cup powdered sugar
  • 1 cup salted butter, melted
  • 1 cup peanut butter
  • 1/2 tsp vanilla
  • 1 bag chocolate chips (11oz)


Directions

Crush graham crackers to the consistency of coarse sand, whisk together with brown sugar and powdered sugar. Add melted butter, vanilla, and peanut butter and stir well. Spread in an even layer in the bottom of a 9×13 baking dish. Top with melted chocolate, refrigerate for at least one hour, slice and serve.


See also


Tater Tot casserole

My wife Shawn and I have a lot in common, especially our tastes in cuisine. We particularly enjoy comfort food type dishes, and we have quite a collection of recipes in this category. We tend to cook these dishes while we are camping (we have a 5th wheel RV trailer the size of Iceland and an equally massive redneck truck to tow it with), so we have dubbed this sort of food “trailer trash”. We love the heck out of it.

Skip to the short version

” If you’re a wimp, top with the recommended two cups of cheese “

This recipe is fits squarely into the above category, and we couldn’t be happier about that. It’s apparently a classic, but it’s a new one on us. The version we initially came across was this one, but you can find unsurprisingly similar recipes here, here, and here. It includes all the cornerstones of blue collar cooking, namely meat, cheese, potatoes, and cream of chicken soup. There is no way this can suck.


Ingredients

  • 1 lb ground beef (We prefer to use ground turkey. Get over it.)
  • 1/2 medium onion, finely chopped
  • 1 can (10.75oz) cream of chicken soup.
  • 1 small package (16oz) frozen Tater Tots
  • 2 cups shredded cheddar cheese


Directions

Preheat your oven to 375 degrees F. If you don’t know what “F” means, I’m not going to explain it. That’s your fault for not paying attention in school. In a skillet, sauté the onion in a little butter and olive oil. Add the ground beef and cook until browned. If you prefer a bit more onion-y-ness in your food, brown the beef first and add the onion after. Or, if you are feeling particularly lazy, you can use dehydrated onion instead.

Stir the cream of chicken soup into the ground beef mixture, salt and pepper to taste, and spread evenly in the bottom of a 9×13 baking dish. Top with the frozen Tater Tots in whatever form of symmetry makes you feel good about yourself. In a related side note, do not attempt to eat a frozen Tot – they are crazy disgusting when not cooked. I’ve heard. Bake for about 30 minutes or until the Tater Tots are golden brown. Don’t worry about the cheese, we haven’t forgotten it. That comes next.

omg   cheeeeeeeeeeeeeeeeeeeeeeeese

omg cheeeeeeeeeeeeeeeeeeeeeeeese

Remove casserole from oven and, if you’re a wimp, top with the recommended two cups of cheese. If, on the other hand, you feel more fiercely independent and confident in your kitchen abilities, add three cups of cheese. OR FOUR. Don’t let some stupid recipe tell you how much cheese is enough – that’s your decision dammit. Once you have added the appropriate amount of cheese, return the casserole to the oven and bake until the cheese is golden brown and bubbly, say 5 or 10 minutes.

Serve with a nice… Actually, you know what? Screw the side dishes. This has everything in it already. Just eat it!

Trailer trash heaven on a plate.

Trailer trash heaven on a plate.


tl;dr

Tater Tot casserole

Ingredients

  • 1 lb ground beef or turkey
  • 1/2 medium onion, finely chopped
  • 1 can (10.75oz) cream of chicken soup.
  • 1 small package (16oz) frozen Tater Tots
  • 2 cups shredded cheddar cheese


Directions

Preheat oven to 375 degrees F. Sauté onion in butter and olive oil, add ground beef/turkey and cook until browned. Stir in cream of chicken soup, salt and pepper to taste, and spread evenly in the bottom of a 9×13 baking dish. Top with frozen Tater Tots and bake for 30 minutes or until Tater Tots are golden brown. Remove casserole from oven, top with cheese, and return to oven for 10 minutes or until cheese is melted and bubbly.


See also


Sizzling Stone

meter-goodThis week I visited one of my regular South Bay lunch spots: Sizzling Stone in Milpitas. The name pretty much describes exactly what this place is about – hot rocks with stuff cooking on them. More specifically, your lunch is served in a heavy duty stone bowl that’s roughly the same temperature as the surface of the sun.

If you asked me to describe Sizzling Stone in five words or less, I would reply with “Chipotle meets Chili’s in Seoul.” As you walk up to the main glass-fronted counter, you are presented with a bewildering array of menu options on a large board on the back wall. Ignore it. Instead, simply tell the friendly waitstaff you want a bowl and begin pointing vaguely at the ingredients you want in it. There are noodles, three kinds of rice, a ton of veggies, a few meat options, and about a billion other toppings to choose from. When you’re done assembling your masterpiece, they take the bowl and throw it directly on a burner as-is. While you wait for your lunch to heat up, grab some sauces, a bit of extra kimchee, and find a table.

When they say "hot lunch" they aren't kidding.

When they say “hot lunch” they aren’t kidding.

“It’s like the Running of the Bulls, only you’re fleeing from dilapidated 1990′s minivans”

Your bowl will arrive at your table a few minutes later at several thousand degrees Kelvin. Add your sauce, stir it up, and enjoy (carefully). The very best part about this place is how customizable the food is. You can go totally healthy or totally bad-for-you. You can go spicy, garlicky, saucy, or none of the above. Even the pickiest eaters are guaranteed to find something here that they will like, and adventuresome types will have a good time as well. Prices are about $11 per person including a drink, which is on the medium-to-high end of the lunchtime value scale. Mostly you’re paying for the presentation.

This next point isn’t really the fault of Sizzling Stone itself, but I’m obligated to report that navigating the Milpitas Square shopping area to get to this restaurant is freaking terrifying. It’s like the Running of the Bulls, only you’re fleeing from dilapidated 1990’s minivans festooned with Hello Kitty plush toys. The parking lot – which appears to have been designed by M. C. Escher on mescaline – is specifically constructed to lure you down dead end aisles so that you can get trapped by someone learning how to park their car for the very first time. Your best bet when this occurs is simply to leave your vehicle wherever it happens to be at the moment, just like everyone else has. When you are done with your meal, odds are you will find yourself blocked in by a half primered Del Sol with a compact disc hanging from the rear view mirror. If you escape this pit of automotive hell with fewer than three or four dozen door dings, consider yourself lucky.

In spite of the parking lot issue, I rate Sizzling Stone a respectable 87 Third Degree Forearm Burns out of a possible 115. This place is certainly worth checking out if you’re in the area, but I’d recommend getting a rental car first.

Sizzling Stone
510 Barber Lane
Milpitas, CA 95035
(408) 324-1107
www.mysizzlingstone.com

Sizzling Stone on Urbanspoon

I give Sizzling Stone high marks for its clean, modern interior.

Neat, clean, and noodly. This is my kind of place.


Cast iron, part 1: Getting started

The most awesome thing in my kitchen right now, except perhaps for a leftover jar of Nutella, is my set of cast iron cookware. I absolutely love it. Cast iron cooks like a dream, it (can be) super easy to clean, and it will literally last a lifetime. I have no particular opposition to modern non-stick surfaces, but there’s something very simple and honest about cast iron – minimizing one’s daily intake of Teflon is a nice side benefit.

” You can whack people on the head with it “

Another key advantage of cast iron is its ability to make food wonderfully browned and crispy. I’m sure there’s a scientific explanation for why this is, but I’m quite happy considering it to be magic. Cast iron also does a remarkably good job of distributing heat across its surface, allowing a bit more margin of error for burner-temperature-challenged individuals.

Every kitchen needs a set of these babies.

Every kitchen needs a set of these babies.

Now that I’ve convinced you to take the plunge (I have, haven’t I?), it’s time to start shopping for your first piece of cast iron cookware. I highly recommend starting out with a Lodge 8″ or 10″ skillet, not because they’re the best you can buy, but because they’re fairly well made, cheap, and good for making mistakes in as you learn. Also, if you happen to find yourself in a 1920’s cops-and-robbers film, you can whack people on the head with it. Brand new pre-seasoned Lodge skillets are around $15 and can be found just about anywhere. At this early stage of your cast iron career, I would not recommend buying anything antique or used or weird. Just stick with the basics. You will also need a metal spatula. Metal. Not plastic or wood or silicon or narwhal tusk. METAL. Trust me on this one. If you don’t already have a metal spatula, buy this one.

Ok, now we’re ready to talk about seasoning. In this context, “seasoning” does not mean salt or pepper or anything vaguely related – it’s the glossy nonstick finish that develops on a piece of cast iron cookware the more it is used. Some people might think that this kind of seasoning is supposed to add flavor, but that is not the case. It more literally refers to being seasoned, as in experienced, and that simply means the cookware behaves more reasonably when you’re cooking with it. There is an absolutely superb cast iron seasoning guide on richsoil.com; I highly recommend you give it a read-through if you’re curious about the finer details of the process. Here’s the 30 second version: Wipe down your cast iron with a very thin layer of oil and stick it in the oven at 400 degrees for an hour. It’ll smoke a bit so make sure you have your vent fan on. In addition to that (or instead of), simply use your cast iron for every day cooking and it’ll season itself. Just remember that you always need to cook with a small amount of actual oil or fat and not a freaky imitation of dubious origin.

You now have everything you need to start cooking with cast iron. For the time being, go with easy stuff like sausages or grilled cheese sandwiches. Stay away from anything acidic (e.g., tomato sauce) or liquid-y (e.g., pancakes, eggs). When it comes time for cleanup, simply scrape the pan with your spatula and wipe thoroughly with a paper towel. It should be spotlessly clean at this point and ready to be put away, but if not go ahead and hit it with a tiny bit of soap and water.

Next: Cast iron part 2: Cooking and cleaning