Most banana bread recipes go something like this: Smash up some bananas with eggs and flour and bake for a while. That approach works well enough, I suppose, but that’s what everybody does. Don’t you want to be a different? Of course you do. The recipe I am posting here adds a few more steps, but those steps are very much worth it. Out of all the different banana bread recipes I’ve tried, this one produces the best results. There are easier recipes to make and ones that mess up fewer dishes in the process, but if you want truly amazing banana bread then look no further. There are many versions of this recipe posted around the interwebs, but the original recipe was apparently published in Cook’s Illustrated Magazine at some point in time I can’t be bothered to look up.

Spots = sweet = delicious.
” Ten pounds of bananas stuffed into a five-pound sack “
Before we get into the details of the other ingredients, obviously you are going to need bananas. Good, ripe ones, maybe even over-ripe. Sometimes it can be a challenge to collect exactly the correct number of correct-ripeness bananas precisely when you want to make banana bread, so anytime you end up with an uneaten banana on its last legs, peel it and throw it into a bag in the freezer. A few iterations of this and before you know it you’ll have a half dozen nicely ripened bananas ready for bread making. If this strategy sounds vaguely familiar, it’s because I follow the same process with the ingredients for my chicken stock recipe, which you have undoubtedly already read. Right? *wink wink*
Ingredients
- 6 large bananas (insert “large banana” jokes here)
- 1 3/4 cups all-purpose flour
- 1 tsp baking soda
- 1/2 tsp table salt
- 8 tablespoons (1 stick) unsalted butter, melted
- 2 large eggs
- 3/4 cup packed light brown sugar
- 1 tsp vanilla extract
- 2 to 3 tsp granulated sugar
Other stuff you’ll need
- a large microwave-safe bowl
- a saucepan
- a mesh strainer
- a loaf pan of some kind, 8 1/2″ will do
- patience
- trust (Some of the steps are odd, but I promise it’s worth it.)
Directions
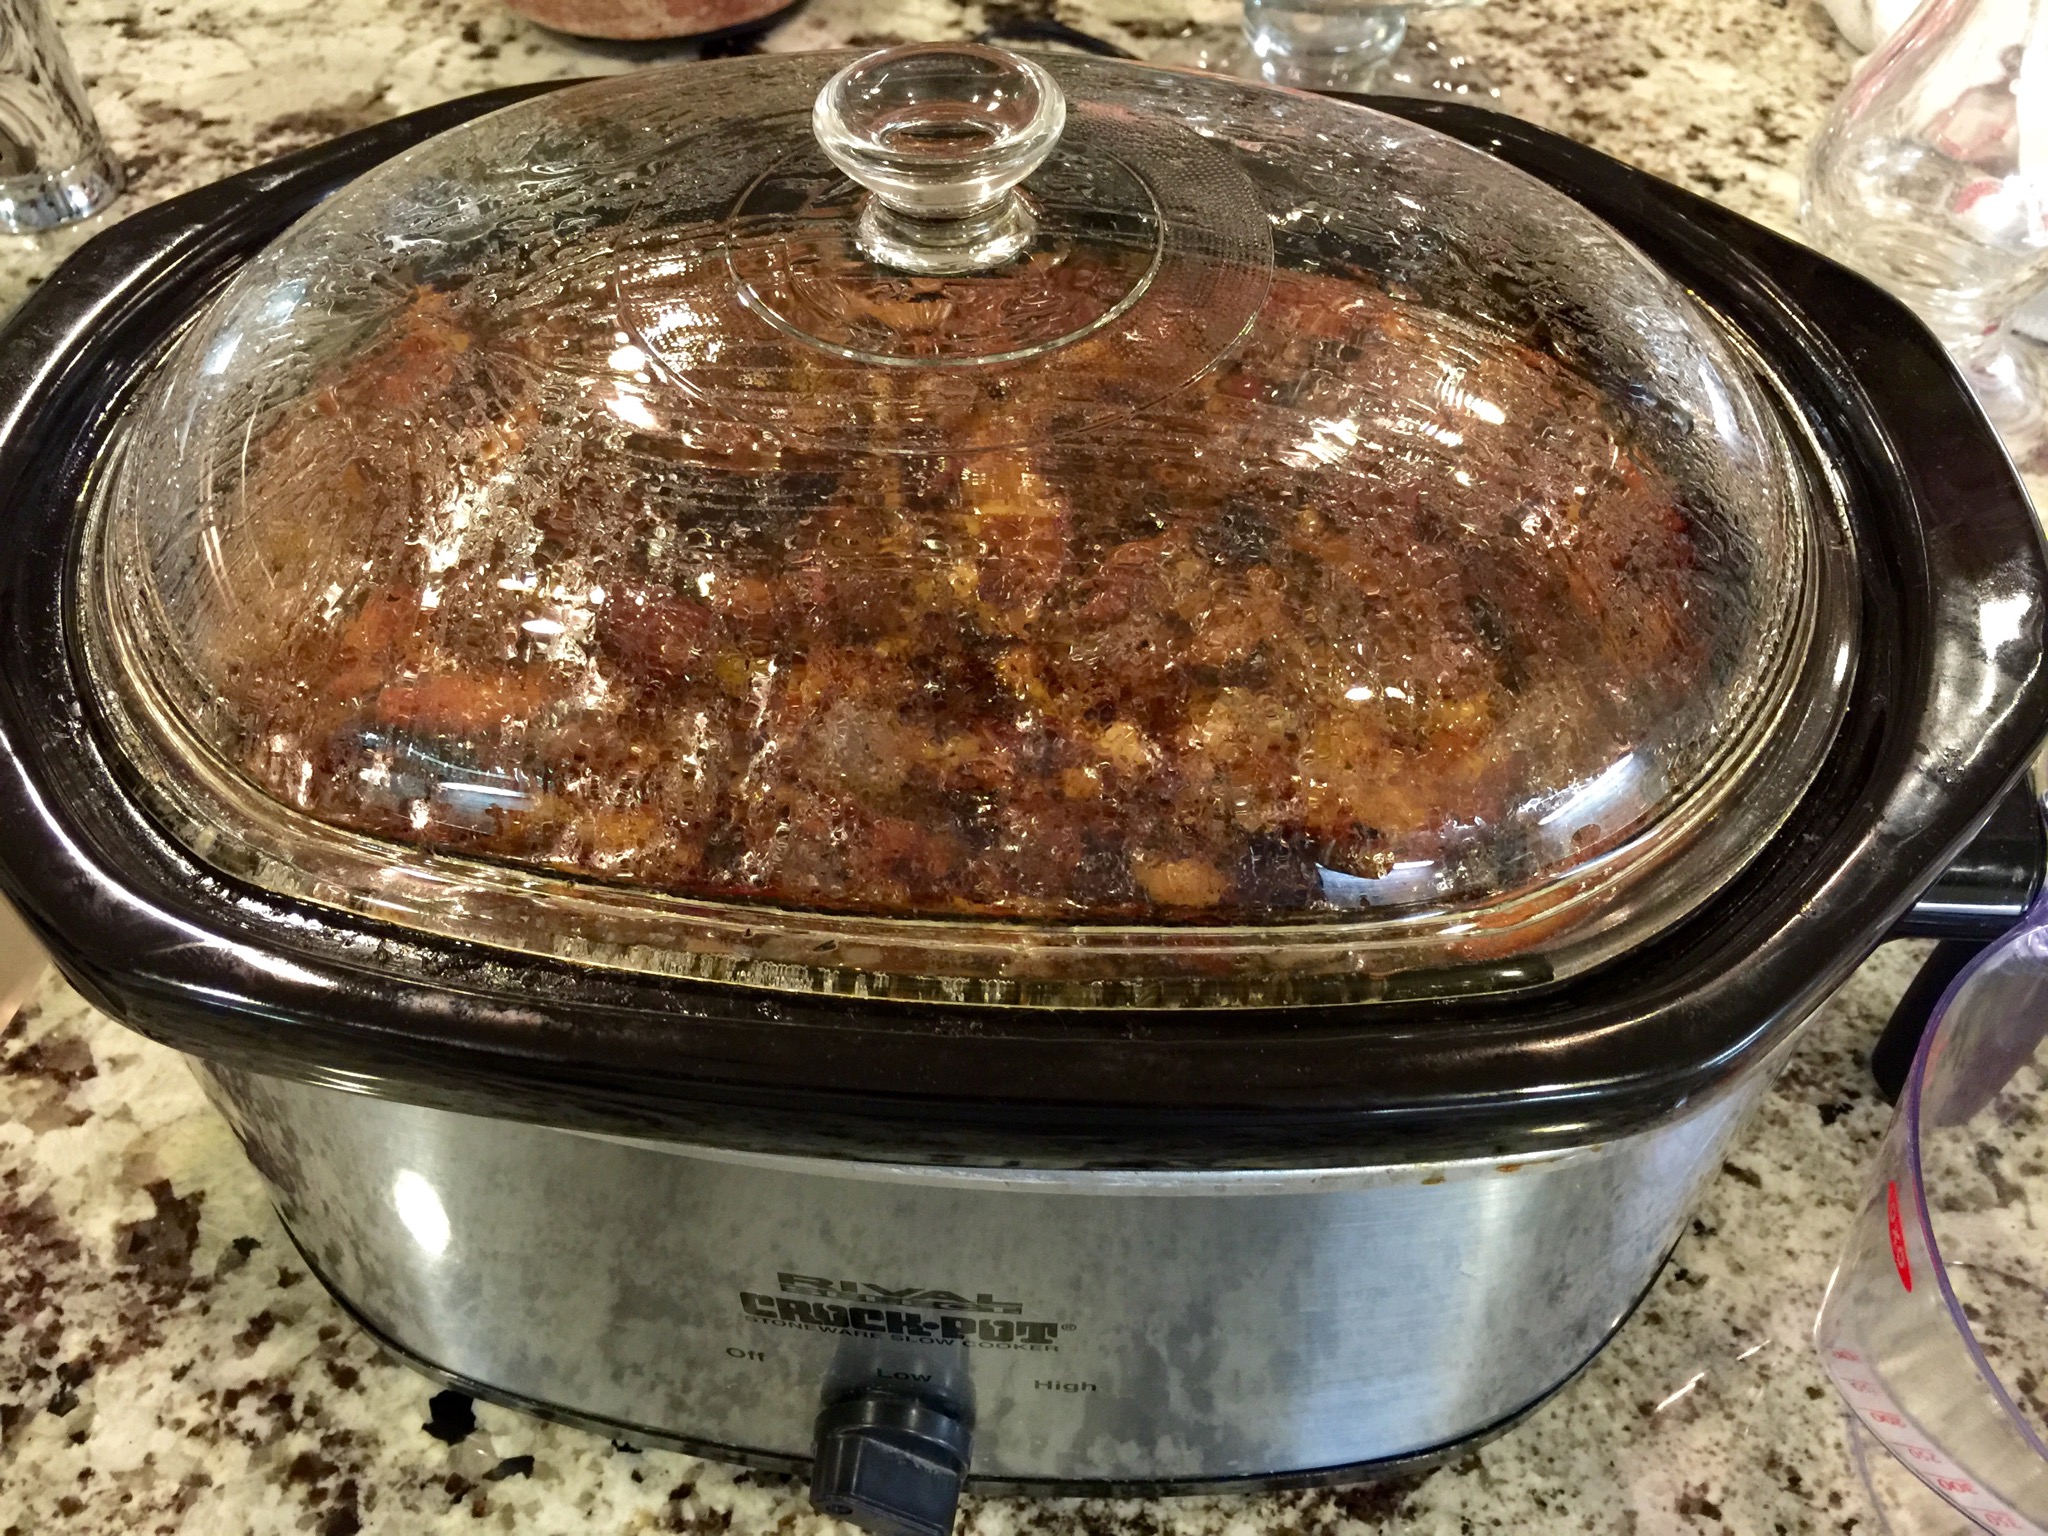
Preheat your oven to 350 degrees F. Take one of your six bananas – a decent-looking one that isn’t too mushy – and set it aside. Take the remaining five bananas, frozen or otherwise, and put them into a large microwaveable bowl. Cover tightly with plastic wrap, poke a few holes for ventilation, and microwave for five minutes, six if some of the bananas are frozen. While you wait for the microwave, put your mesh strainer over your saucepan and get out some hotpads. When the microwave beeps, you will end up with a weird, discolored lump of banana goo floating in clear stuff the same temperature as the surface of the sun.

Fact: Bananas are lethal when microwaved for five minutes.
CAREFULLY remove the plastic wrap, doing your best not to sustain permanently disfiguring facial burns from the steam, and pour/dump the mess of superheated banana material into the mesh strainer perched atop your saucepan. Leave it there for 15 minutes.

I bet you didn’t expect this step.
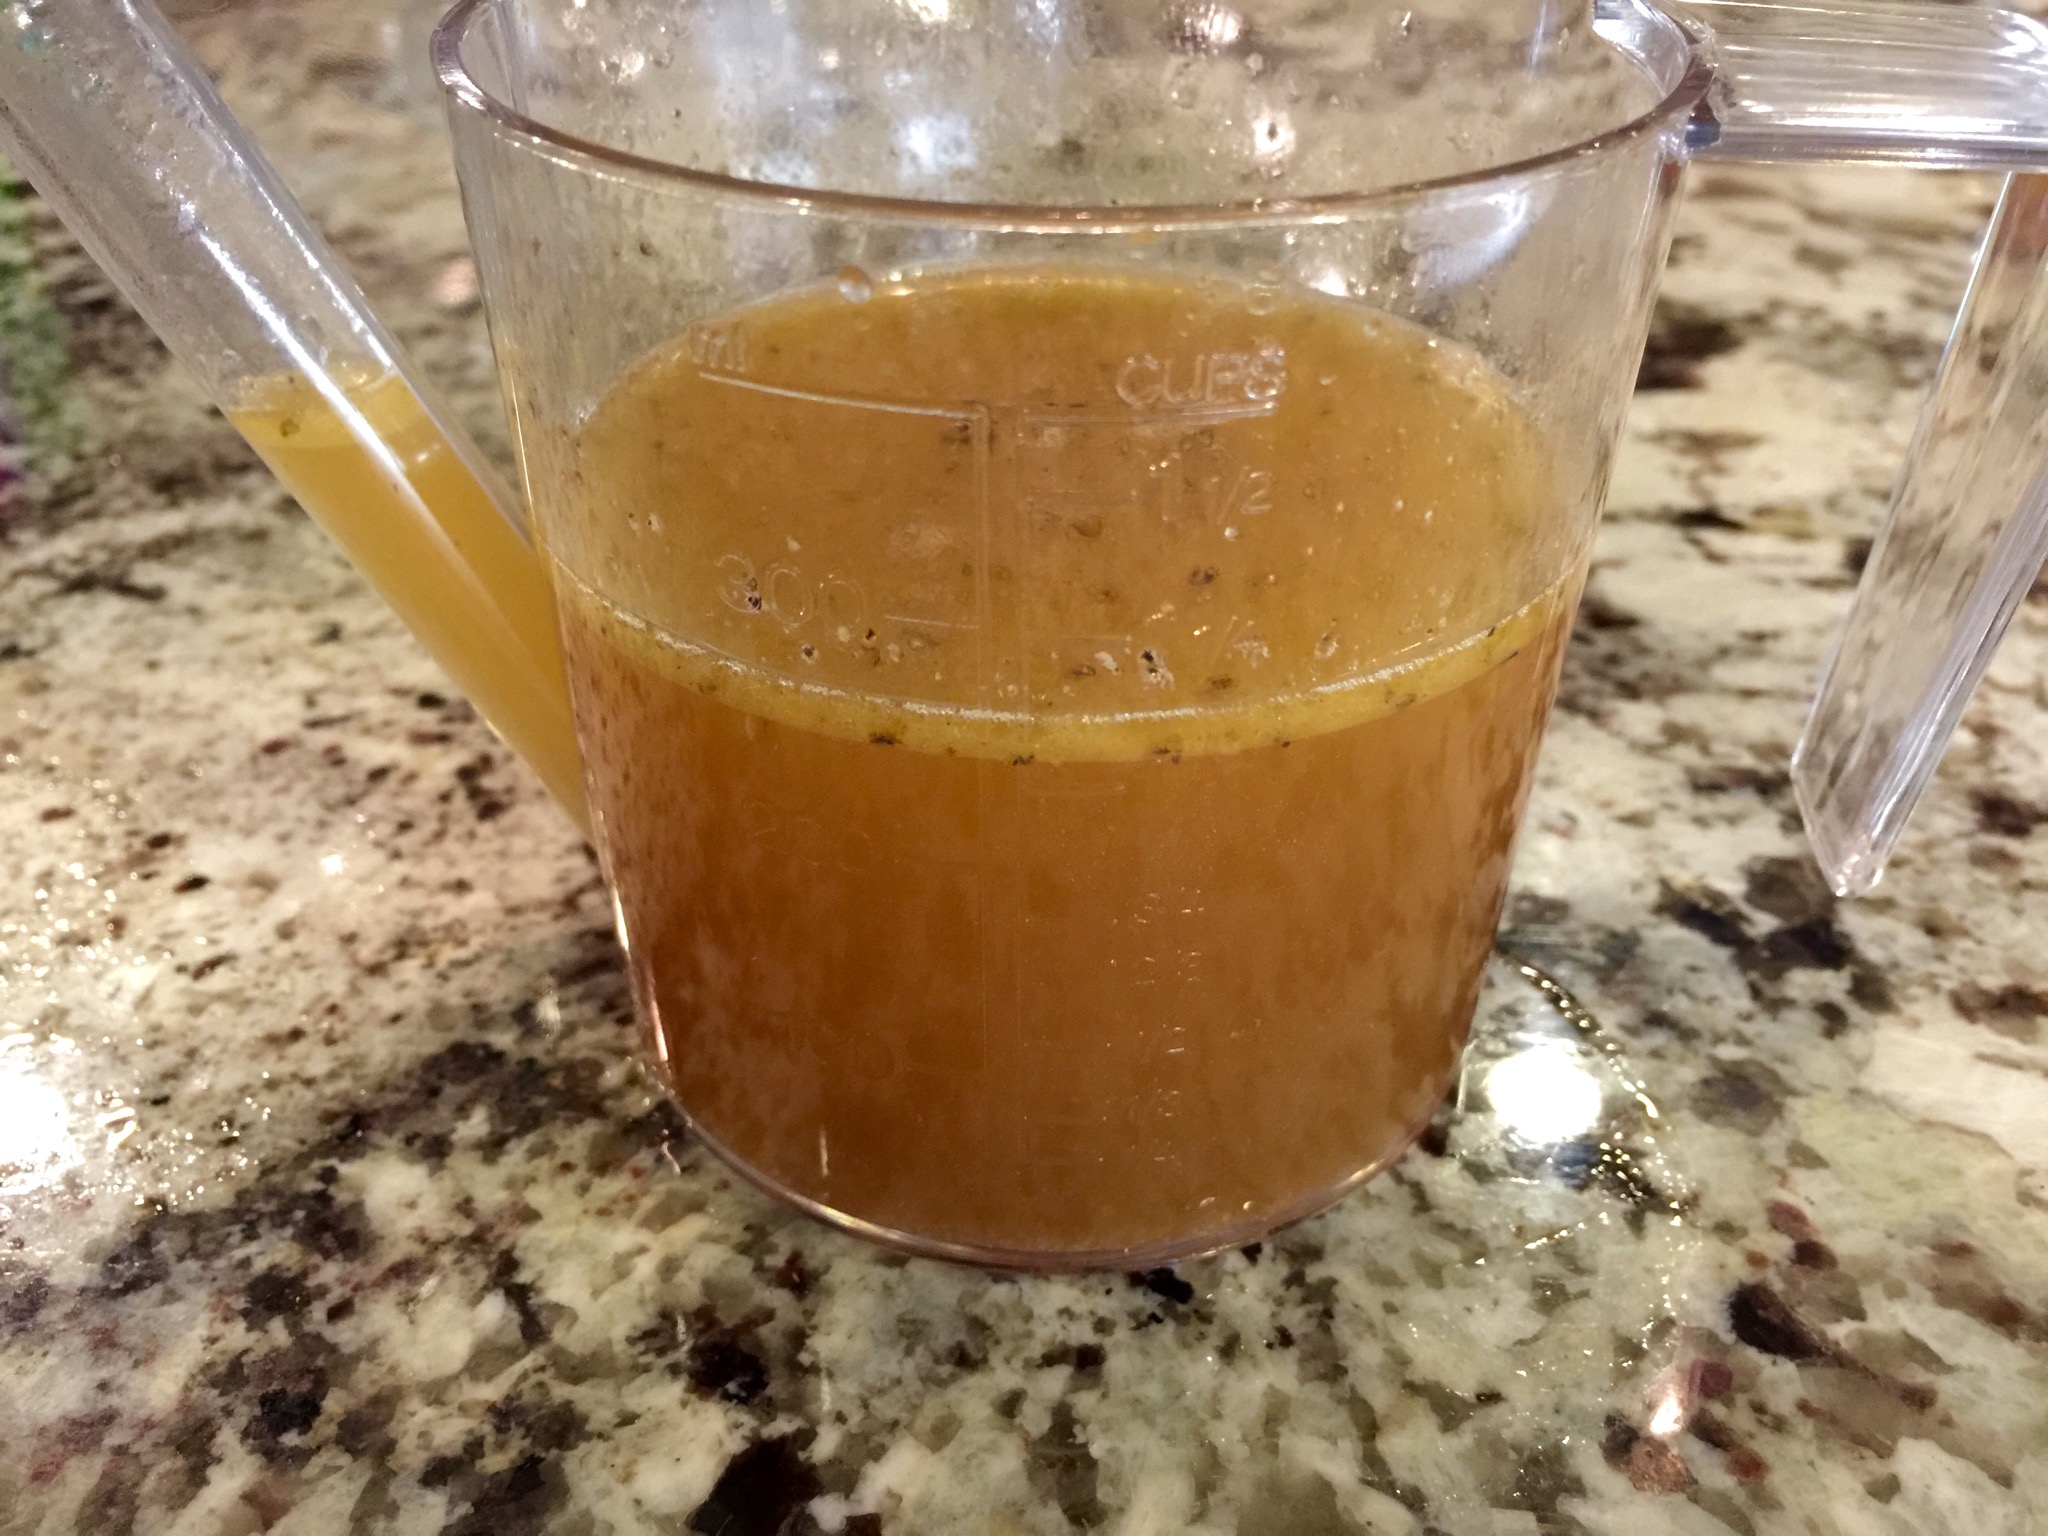
While the banana magma drains, whisk together the flour, baking soda, and salt in a large bowl and set aside. When the 15 minutes are up (yes, you really have to wait the whole 15 minutes), remove the microwaved bananas from the strainer, put them in a medium-sized bowl, and set aside. In the saucepan, you should have collected 1/2 to 3/4 cup of clear liquid. This is pure, unadulterated banana essence (sometimes also called “juice”), and we are going to turn it into banana syrup. Oh yes, we are.

It will thicken up a bit when it’s done.
Simmer the banana juice over medium-high heat until it’s been reduced to 1/4 cup, about 5 minutes or so. When it’s done, pour it into the bowl with the bananas. I know this seems stupid, but what we’ve effectively done here is concentrate all that awesome banana flavor into a smaller, more intense package. It’ll be great, really it will.

It tastes better than it looks.
Add the melted butter, brown sugar, and vanilla and stir well. Before you add the eggs, make sure the mixture isn’t too hot; nobody likes cooked egg bits in their banana bread. Stir in the eggs, then pour the whole mess into the flour mixture and fold everything together, being careful not to over-mix.
If you want to ruin everything, add chopped walnuts at this time. When you’re done with that, you might as well pull the wings off a few butterflies and then go kick a puppy. In case it’s not clear, I recommend against this step.
Walnuts are gross.
Lightly grease your loaf pan and pour the batter in. Take that last banana, slice it, and lay the slices on the top of the loaf along both sides. Leave a gap in the middle to allow the bread to rise as it bakes. Sprinkle the granulated sugar evenly over the top.
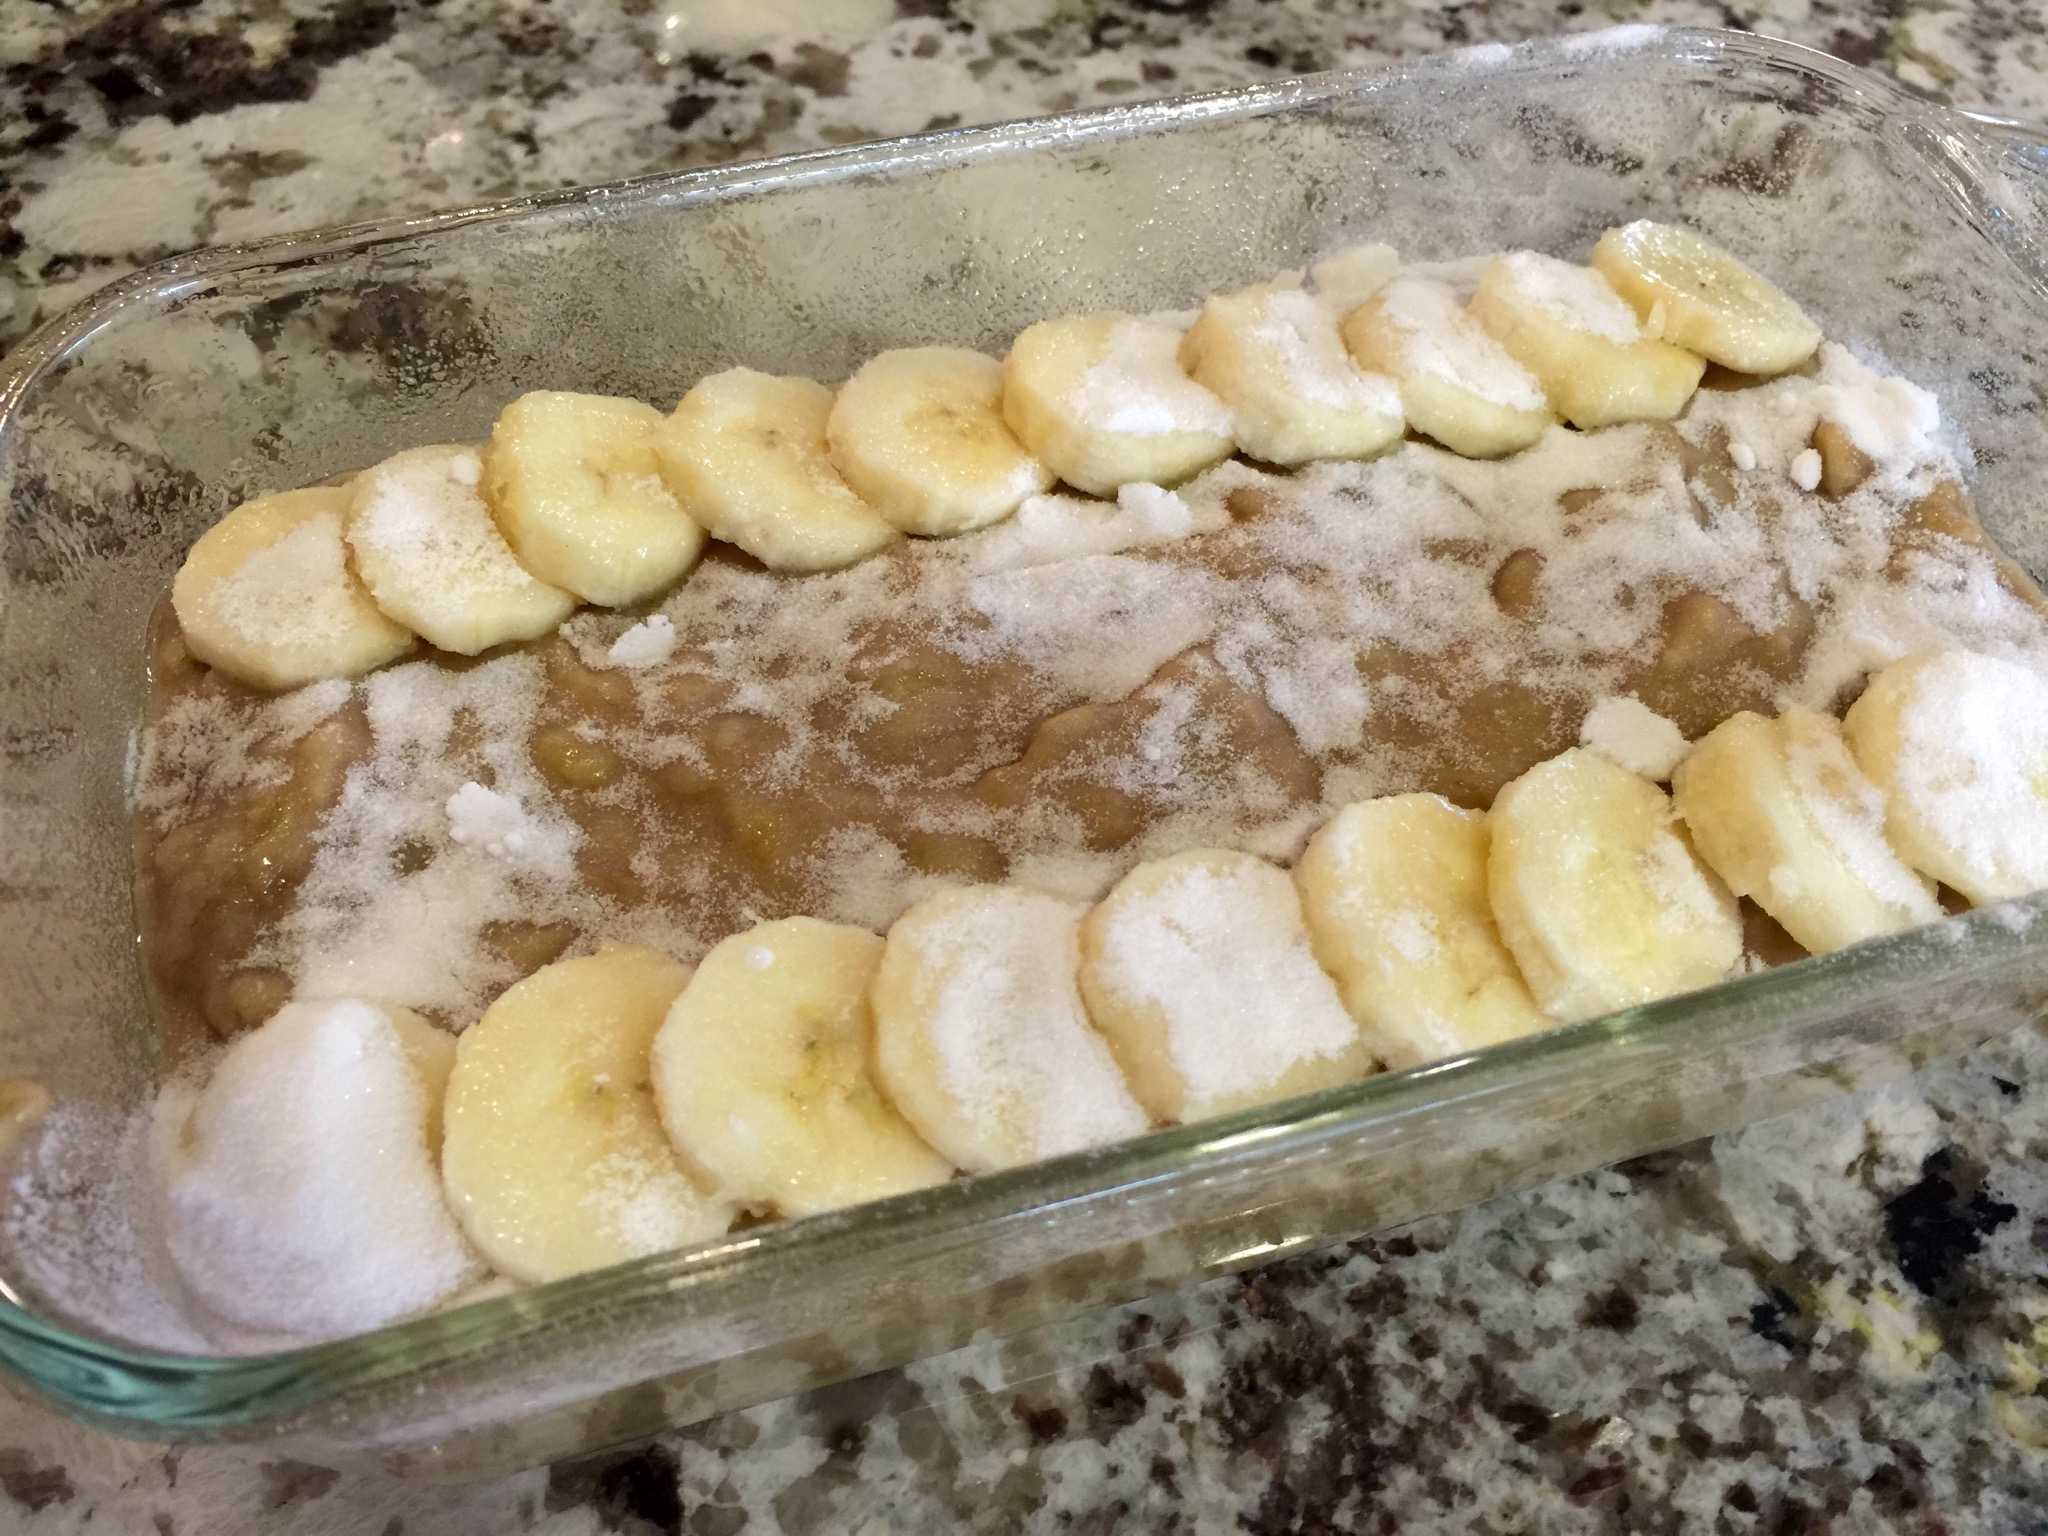
I know, I didn’t sprinkle the sugar evenly. So sue me.
Bake at 350 degrees F for 55 to 75 minutes. Insert a toothpick or wooden skewer into the center of the loaf; when it comes out clean, the bread is done.
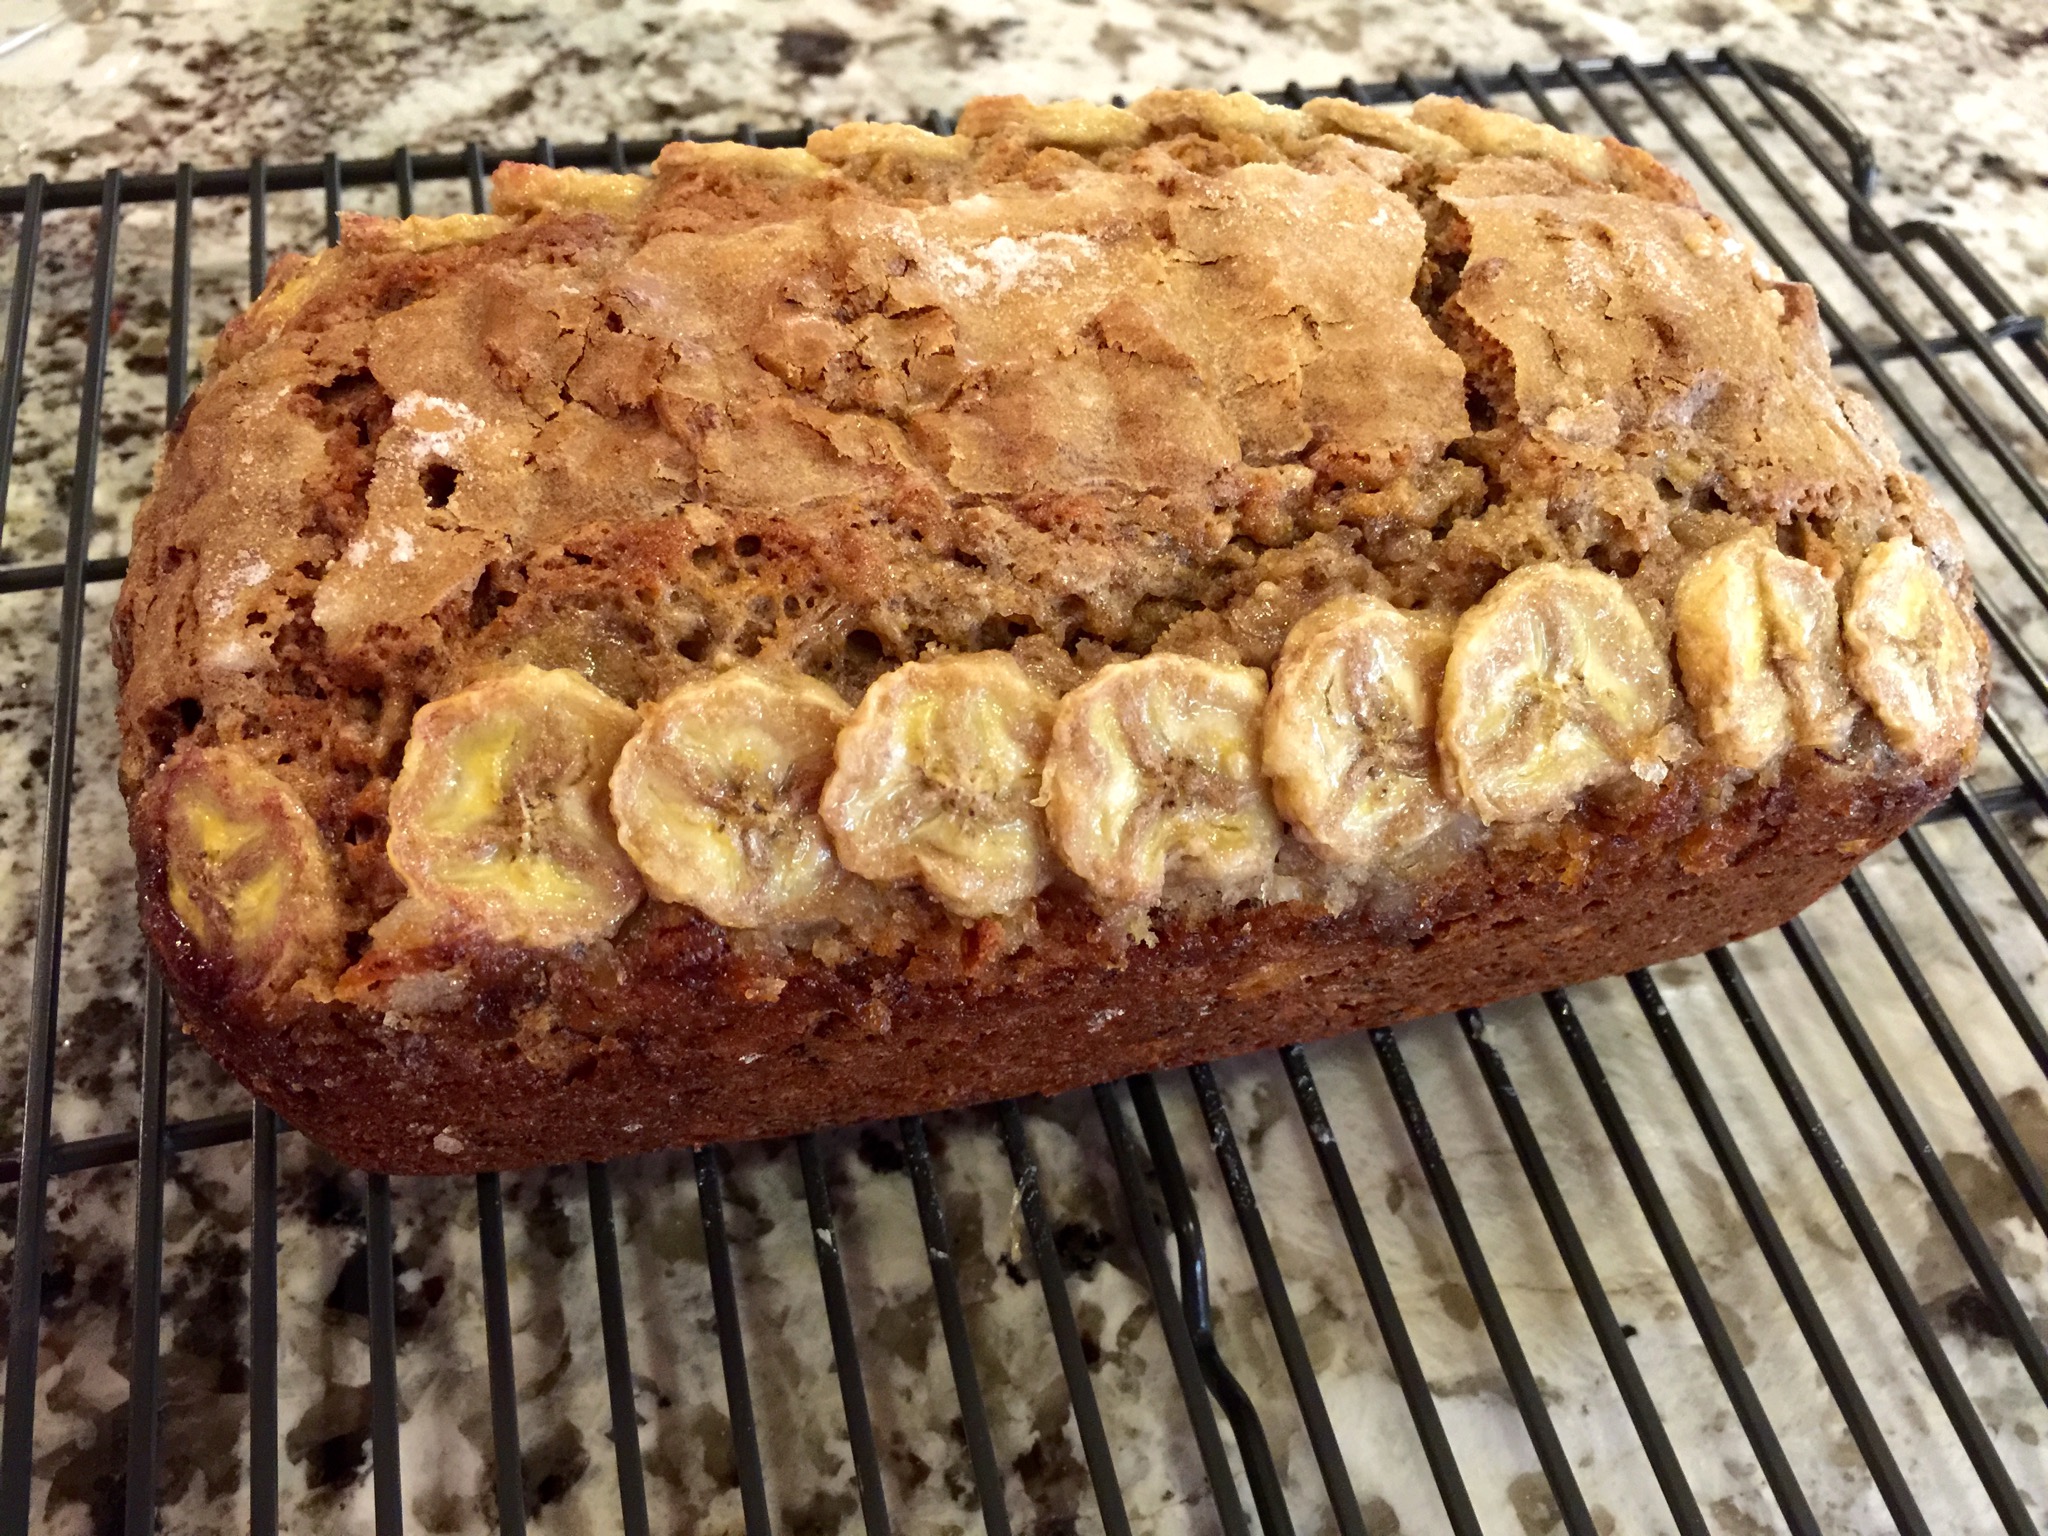
This is ten pounds of bananas stuffed into a five pound sack.
Allow to cool for at least 7 or 8 seconds, cut some slices, and bask in delicious banana glory.

Yes, I do put butter on everything.
tl;dr
Best banana bread ever
Ingredients- 6 large bananas
- 1 3/4 cups all-purpose flour
- 1 tsp baking soda
- 1/2 tsp table salt
- 8 tablespoons (1 stick) unsalted butter, melted
- 2 large eggs
- 3/4 cup packed light brown sugar
- 1 tsp vanilla extract
- 2 to 3 tsp granulated sugar
Other stuff you’ll need
- a large microwave-safe bowl
- a saucepan
- a mesh strainer
- a loaf pan of some kind, 8 1/2″ will do
Directions
Preheat oven to 350 degrees F. Take one banana, slice, and set aside. Microwave the remaining bananas for 5 minutes. Place in mesh strainer and allow to drain for 15 minutes. Pour resulting juice into a saucepan and reduce to 1/4 cup volume over medium heat, then recombine with microwaved bananas. Add melted butter, brown sugar, vanilla, and eggs. Whisk together dry ingredients in a separate bowl. Stir banana mixture into dry ingredients and mix well. Add walnuts if desired. Pour batter into lightly greased loaf pan, lay sliced banana on top and sprinkle with granulated sugar. Bake for 55 to 75 minutes, until inserted toothpick comes out clean.
See also
Standard Recipe Disclaimer
I don’t come up with a lot of my own recipes (unless you count my own personal milk-to-Grape-Nuts ratio), and chances are the recipe posted above belongs to or was inspired by a person other than me. So if you’re wondering whether or not I ripped somebody off, I probably did. Don’t get out the pitchforks and torches just yet though! I want to make absolutely sure I give credit where it’s due, so if you think someone deserves recognition for something that I haven’t already called out FOR CRYING OUT LOUD LET ME KNOW. Thanks, I appreciate it. Here’s a cookie.